Before you start: Note that this is a technical workflow presentation and not a fully fleshed out artistic demo. I had very limited time to put this together for educational purposes, so the actual art output here does not reflect the quality standard we want to achieve. Do better than me, please! Exiles deserves good hair!
Also, if you have access to Ornatrix or Xgen (native to Maya) instead, it’s preferable to author hair textures with those. I focus on Zbrush here because of its wide availability and relatively smaller learning curve of a few hours vs the several days I spent figuring out Ornatrix, and most FC artists do not have Maya licenses to use Xgen. The baking part applies equally to all software workflows :)
Ultimately, the results are what counts, a tool is just a tool. Use what gets you the best outcome.
Perforce directory for preset and template assets can be found here: ConanSandbox\Assets\Content\Characters\Outsource\Hair\
You need:
Zbrush (latest version)
xNormal (
download here
)
Photoshop
Our in-house Fibermesh settings preset, located on Perforce
Note that as an exercise, it’d be great to redo the existing hair textures with current pipeline stuff if you prefer to have an existing hair layout to start from.
How to effectively parse hair reference
Before you start creating your hair textures, it’s important to get very familiar with looking at real hair reference and reading the necessary information from it. Analyzing photos of real hair helps you break down what you need to achieve that texture, length and cut.
As usual, we follow a primary-secondary-tertiary model of parsing shapes.
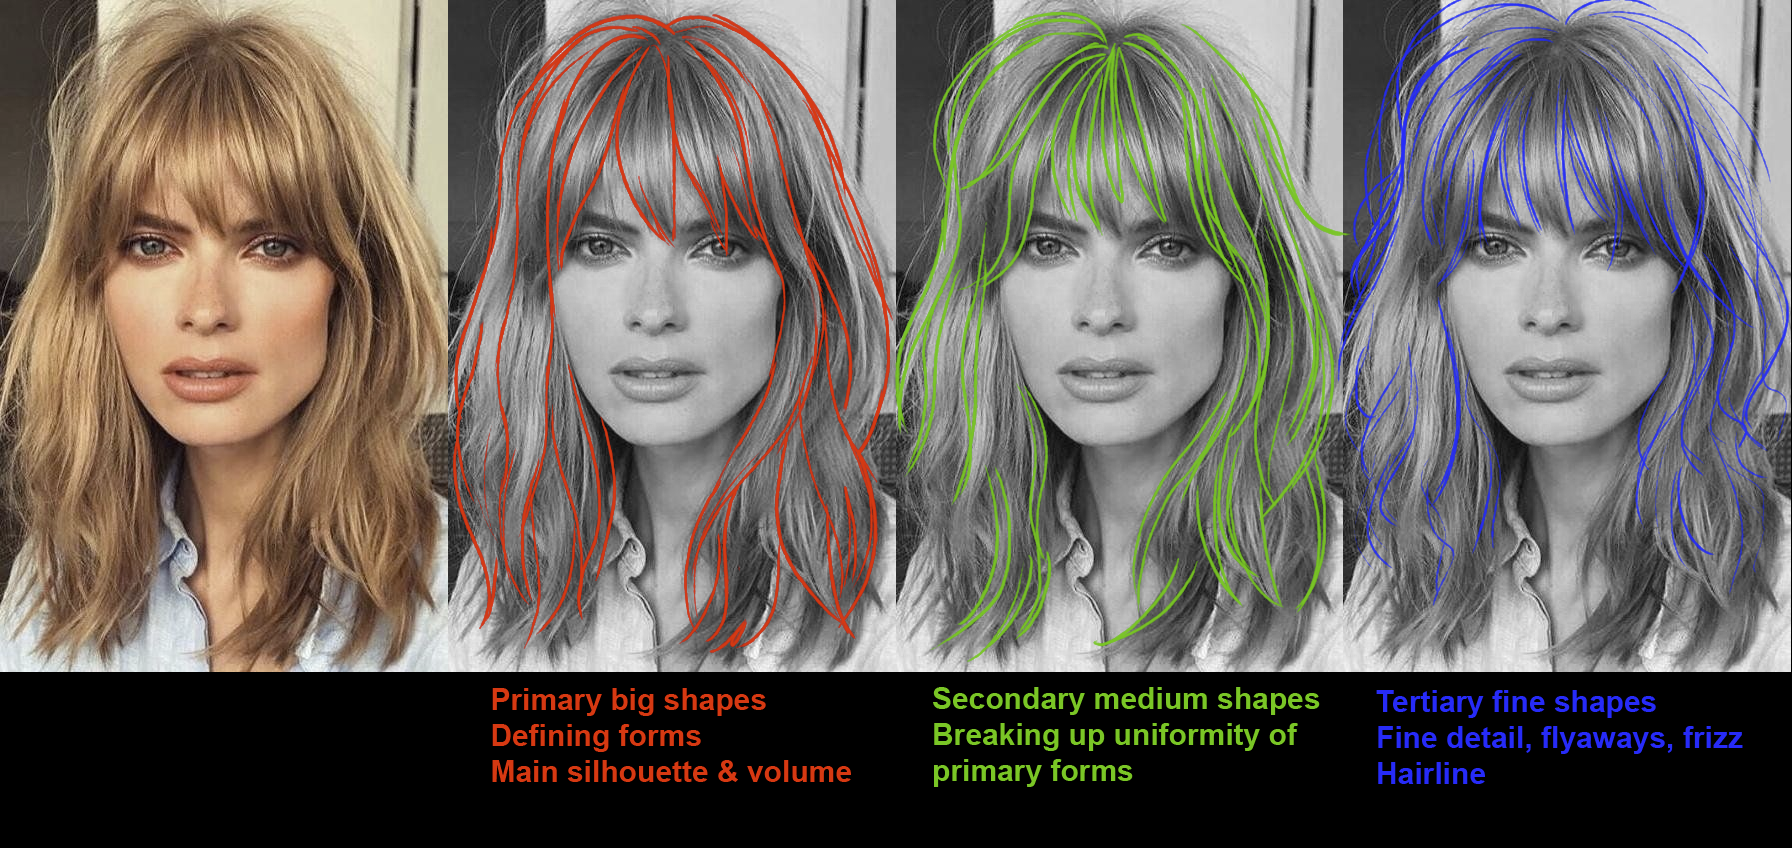
We can see that this haistyle is medium length at longest, requires quite a lot of textural variation in both primary and secondary cards, and also calls for cards for the shorter bangs. A texture sheet for modeling this hair would look something like this:
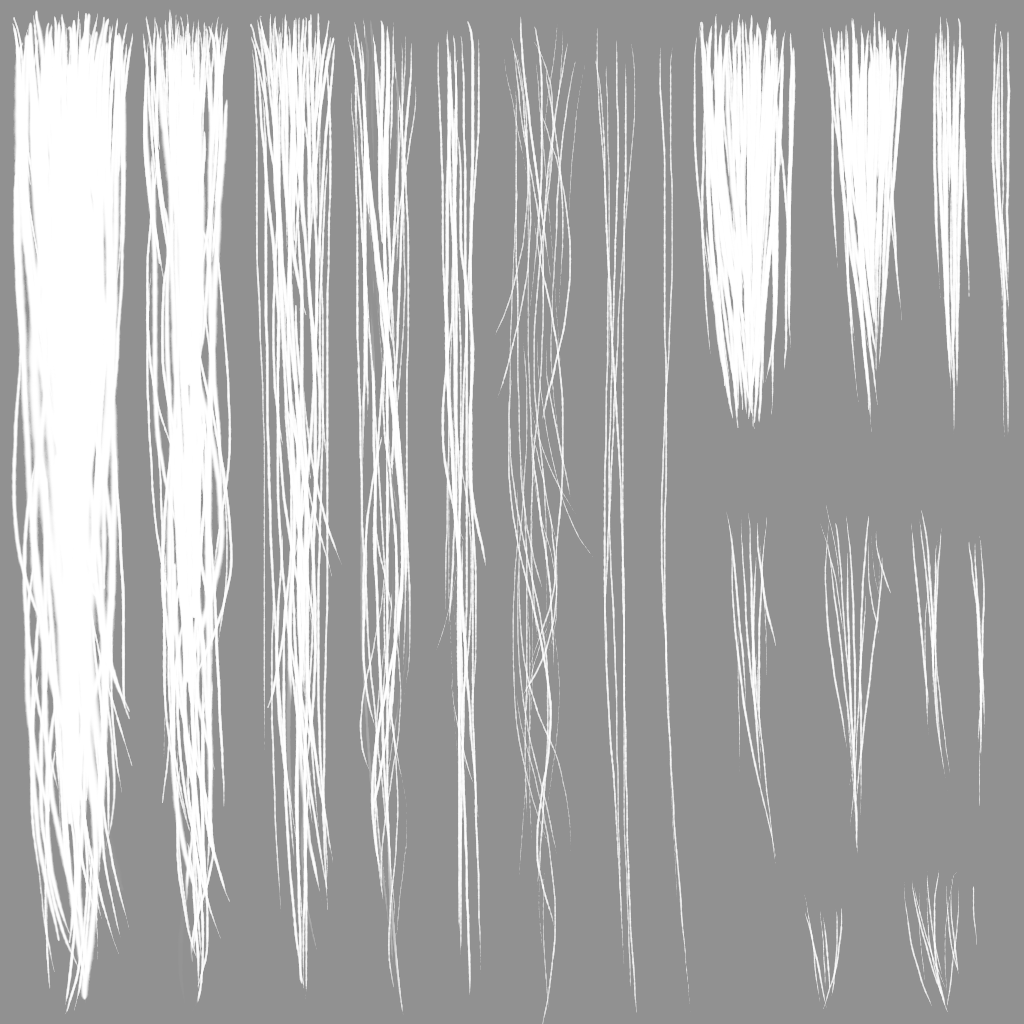
The relatively wide frizz card in the center can be placed in between bigger primary cards to break up any noticeable geometry transitions and to vary the silhouette at glancing angles. The small cards on bottom right can be placed on the visible hairline to blend it more naturally to the scalp.
Hair texture authoring
Steps:
-
Zbrush scene creation for hair texture authoring
-
Planning your hair sheet & generating Fibermesh & settings
-
Styling hair
-
Assigning random group vertex color ID, exporting
-
Baking in xNormal
-
Assembling textures in Photoshop
Zbrush scene setup
TLDR:
Import the bake plane as your texture sheet reference.
Optimize your preview renderer for quick rendering. Toning down or removing shadows helps. Quick rendering becomes very important down the line.
Pick a high ambient light material for previewing fibermesh. Prioritize clarity as you work.
Planning your hair sheet & generating fibermesh
TLDR:
Plan ahead for maximum reusability of the texture sheet you’re making. Consider potential hair chunks you MIGHT need in the future that you can reasonably fit into the sheet, even if you don’t need it for one specific model you’re making. For example, if you’re making a long hair texture sheet, consider adding a small set of short or medium cards for potentially making bangs, fringes, neck fuzz etc.
Conversely, for a sheet of short hair, adding in a few longer cards if you have space can come in handy later.
Plan the thickness of your hair strands carefully and preview render multiple times before you hit Accept. Strands that are too thick look cartoony and goofy ingame, strands that are too thin disappear in the bake and look sickly and wiry ingame. This might take some trial and error and getting a feel for what works at the scale you’re working at, and depends on the size/density of your hair chunk.
Consider sketching out a plan of your texture sheet in a drawing software or onto a subdivided plane.
Subdivide your bake plane with smoothing turned off.
Mask/isolate and polygroup sections of the plane as your hair root parts.
Paint in masks and generate Fibermesh using the preset.
Check hair length and adjust as desired and needed.
Adjust Max Fibers and Coverage to get your desired hair density on the chunk.
Set Fibermesh Profile to at least 4, preferably 6.
Set Fibermesh Segments to 30+ for long hair and 10+ for short hair.
Add Clumps if desired. Will be dependent on root geometry.
Check outcome with a preview render, adjust if needed, and Accept to commit.
Brush straight down with GroomHairLong. If roots are too stiff, set Brush → FiberMesh → Front Collision Tolerance to 5, brush again and smooth the roots.
Adjust hair roots to be roughly at an even level. Turn off Fibermesh masking in Move Topological brush modifiers.
Styling hair chunks
TLDR:
Shift-click drag to isolate hair chunks and ctrl-w to polygroup them.
Use Groom and Move tools to style hair flow. Work on both X and Z axes. Vary depth in hair chunks.
Use Pinch tool to clump hair strands together more tightly. Alternatively, Groom Clump brush.
On the top layers of your hair chunk, break up established polygroups into even smaller groups to create more shape variance and breaks in the hair.
Use Move Topological to shift individual strands around, especially on the left and right edges of the hair.
Use Smooth and Clip tools to shorten hair. Use GroomLengthen and Move to lengthen hair.
If you ended up with hair strands that are too thin, you can use Deformation → Inflate to thicken them, or more localized with the Inflate brush.
Deformation → Polish or Relax can thin out hair that’s too chunky.
Assigning random vertex color ID
Only do this once you’re done styling your hair chunks and ready to start baking.
Polygroups → Auto Groups
Polypaint → Polypaint from Polygroups
Polypaint menu → Adjust Colors, set ‘HSV saturation’ to -1, ‘RGB Gamma’ 0.07. Gamma can be adjusted, what’s important is a clear full greyscale range of colour values across the model.
Exporting and xNormal setup
Merge all your hair meshes together and export them as OBJ (naming conventions don’t matter here). Set your hair bake plane as Lowpoly in xNormal and the hair meshes as Highpoly.
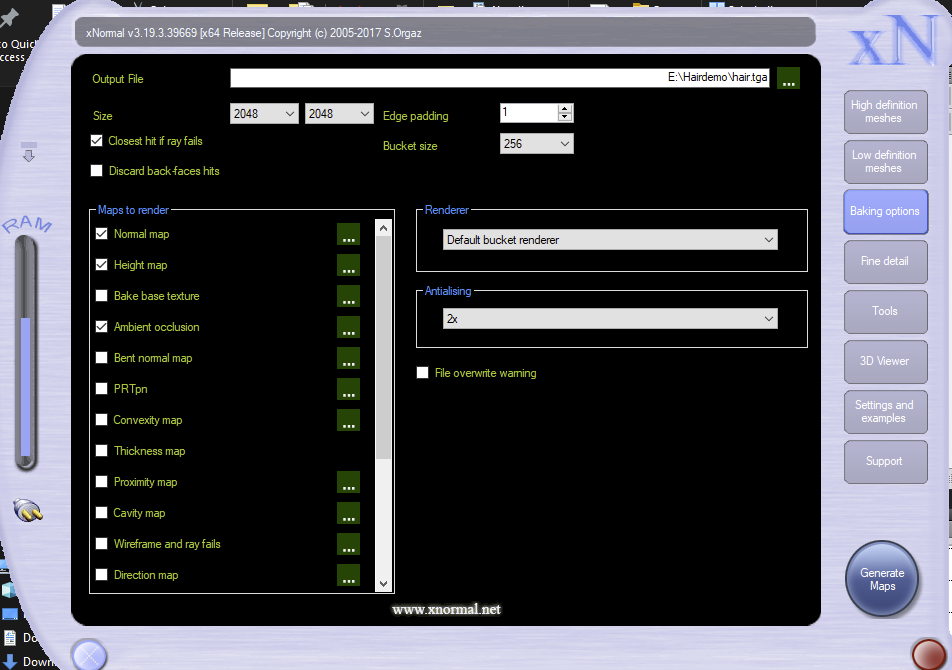
In Baking options, set padding to 1, antialiasing to 2x for test bakes and 4x for final, and bake final renders in at least twice the resolution of your intended ingame texture.
Maps to be baked:
Normal Map (Set options to Tangent space, Y-)
Height Map
Ambient Occlusion (ignore per vertex color must be ON)
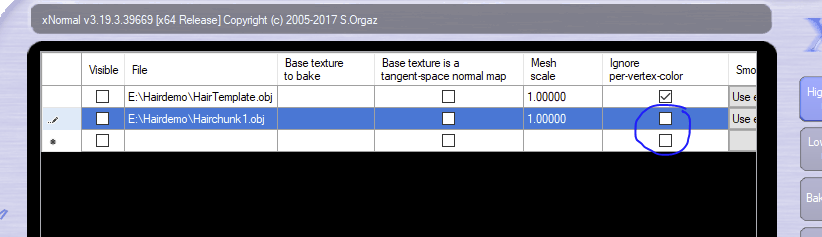
Vertex Color (“Bake highpoly’s vertex colors”, in highpoly view ignore per vertex color must be OFF)
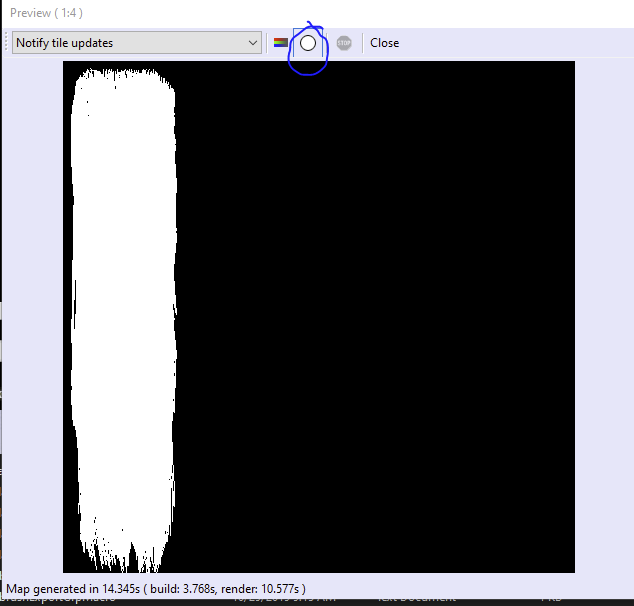
NOTE: A Normal Map bake also produces an opacity bake in the Alpha channel of the output texture:
NOTE: For baking vertex color to texture, in Highpoly view tick ‘Ignore per-vertex-color’ OFF:
Assembling the textures
_D texture
Red channel - Base color overlay
The purpose of this channel is to add subtle detail to the base color of the hair. I typically combine this from the AO map, depth map and the R, G or B channel of the normal map and keep it low contrast and low value. A very subtle noise filter can be added on top.
Green channel - Root mask
Root masking helps blend the hair texture more smoothly to the scalp with more softly dithered transitions. I typically make this by copying the Alpha transparency map and gently painting the hair roots with a black airbrush. Some hair strand transitions can be painted back in.
ALTERNATIVELY you can use GroomColorRoots brush back in Zbrush to paint a color gradient into the hair mesh roots and bake it out as a separate color map.
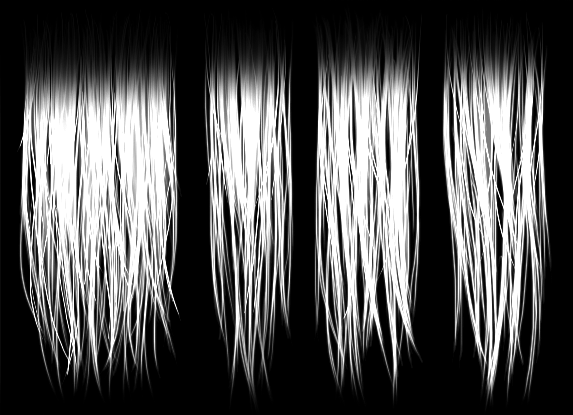
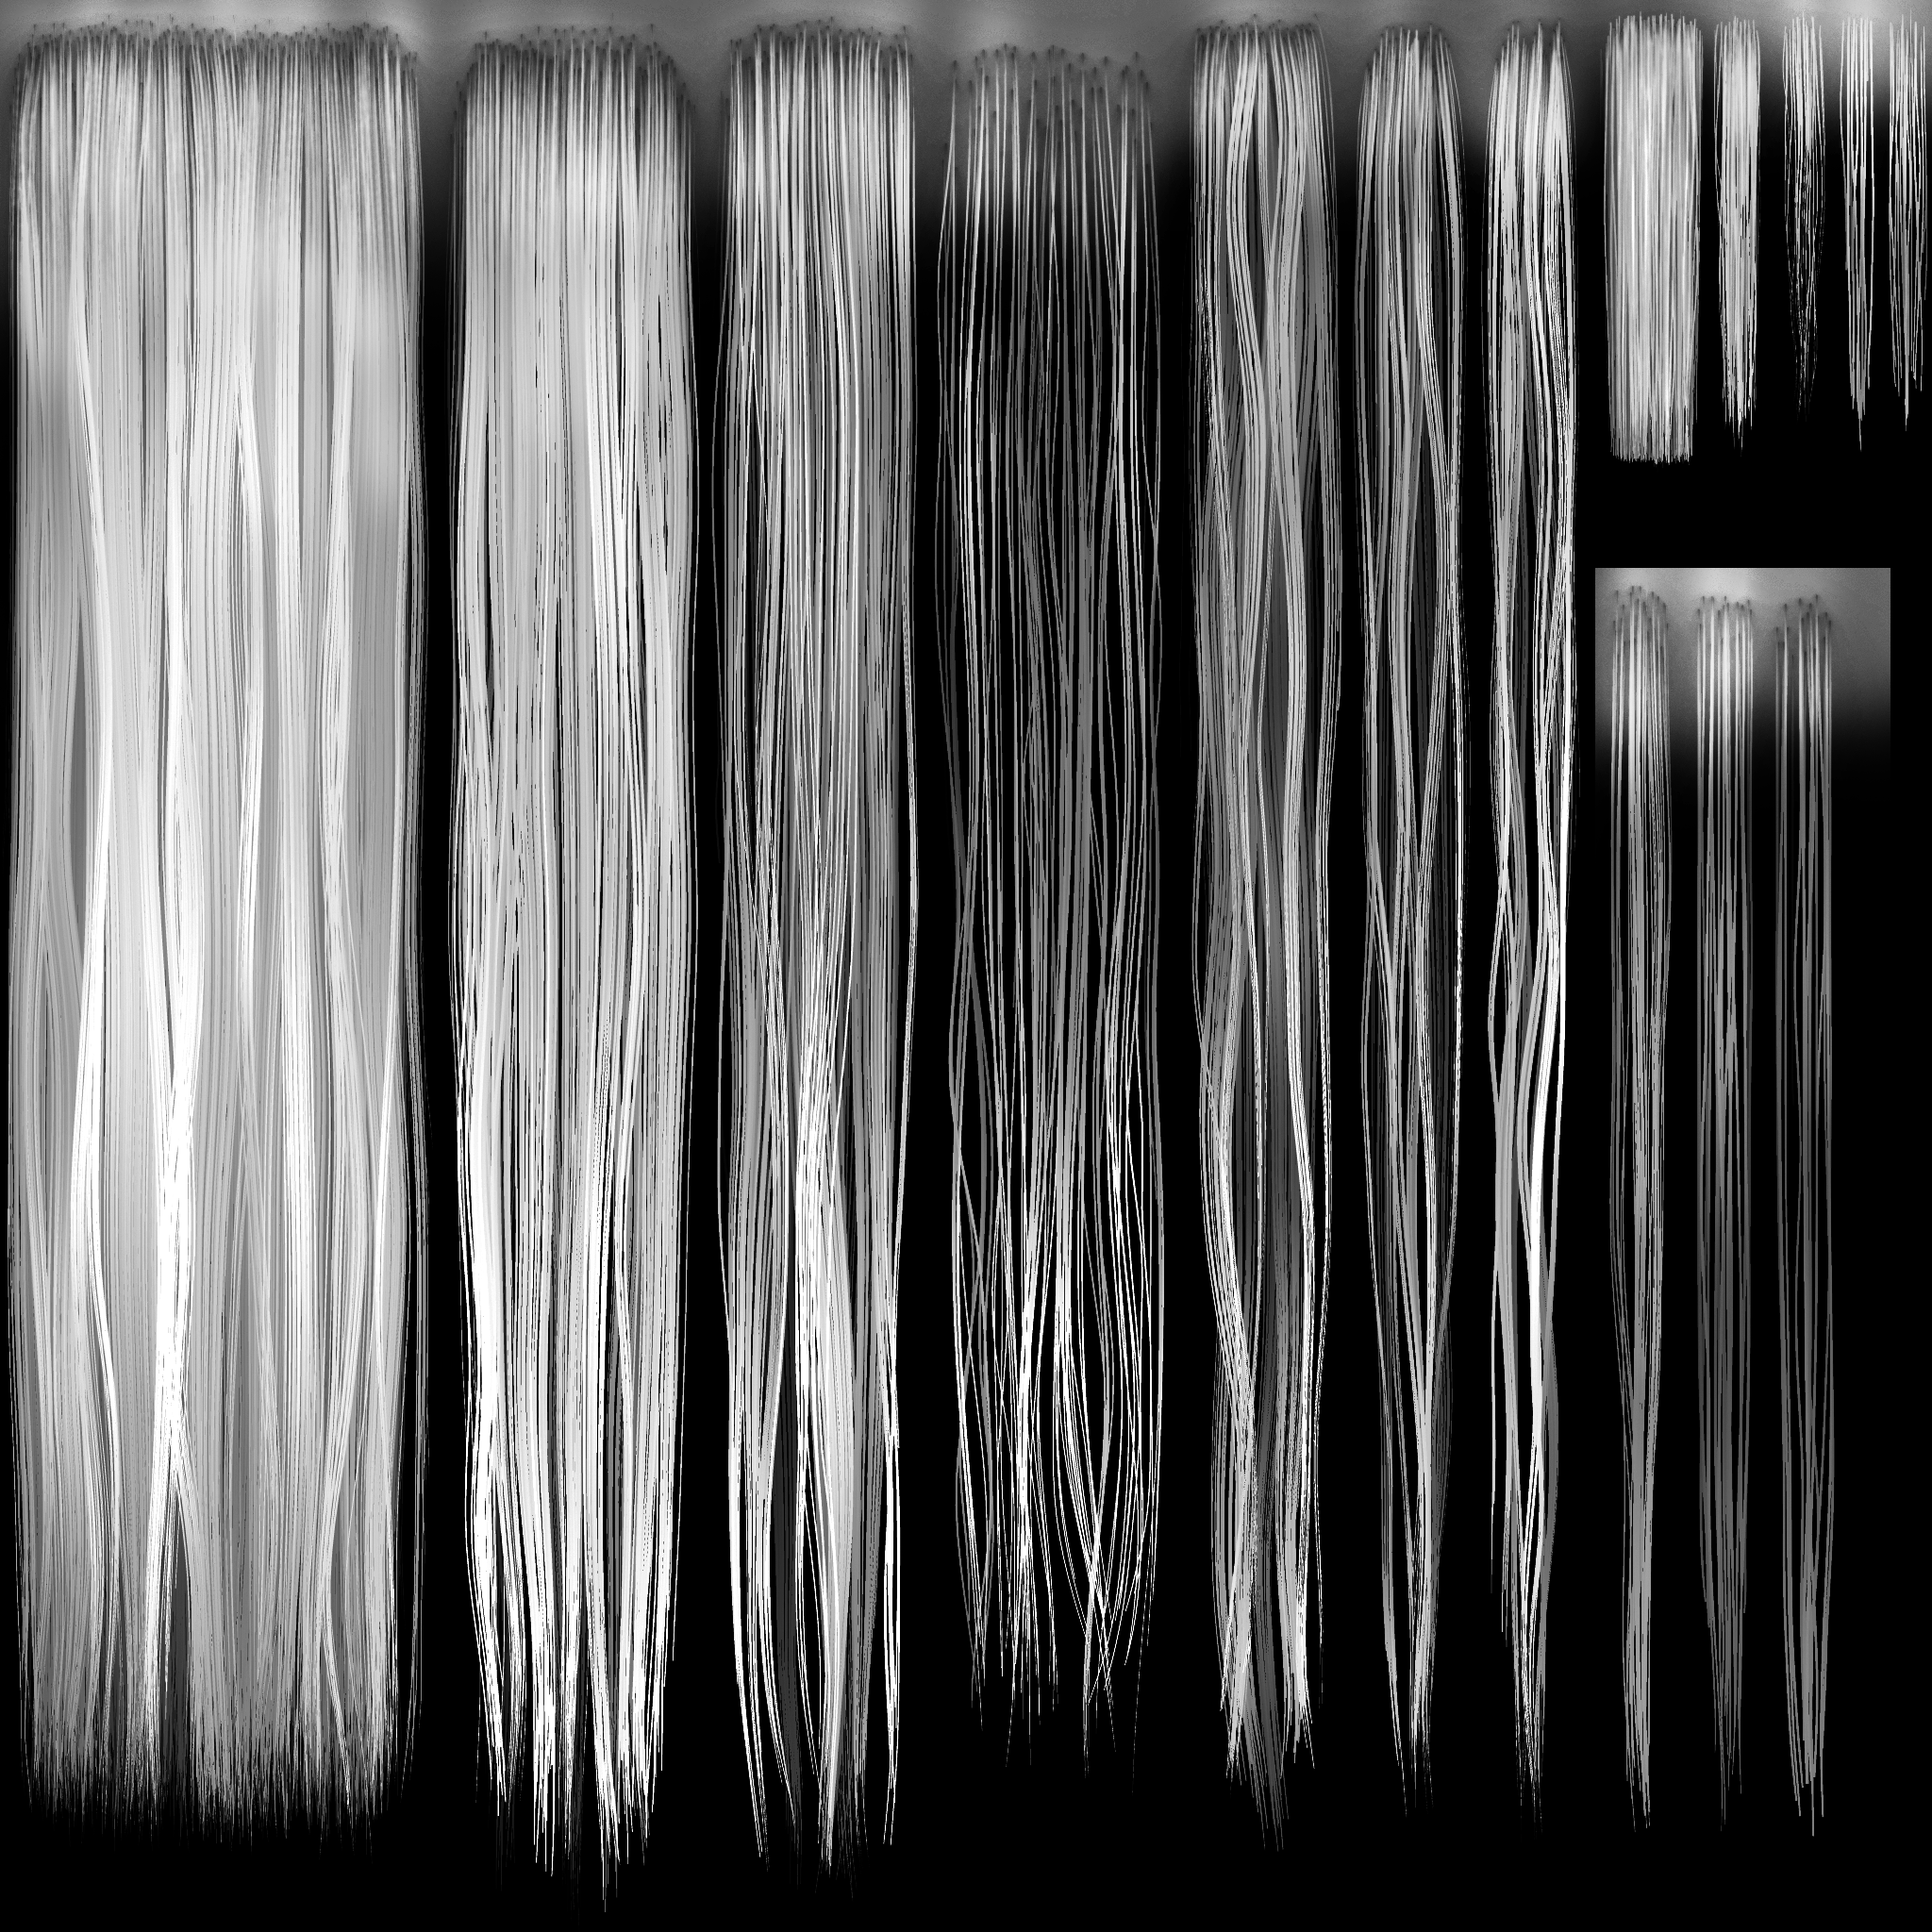
Blue channel - Height map
Paste the height bake straight in.
Alpha channel - Opacity
Paste opacity map straight in from the Alpha channel from the Normal Map bake.
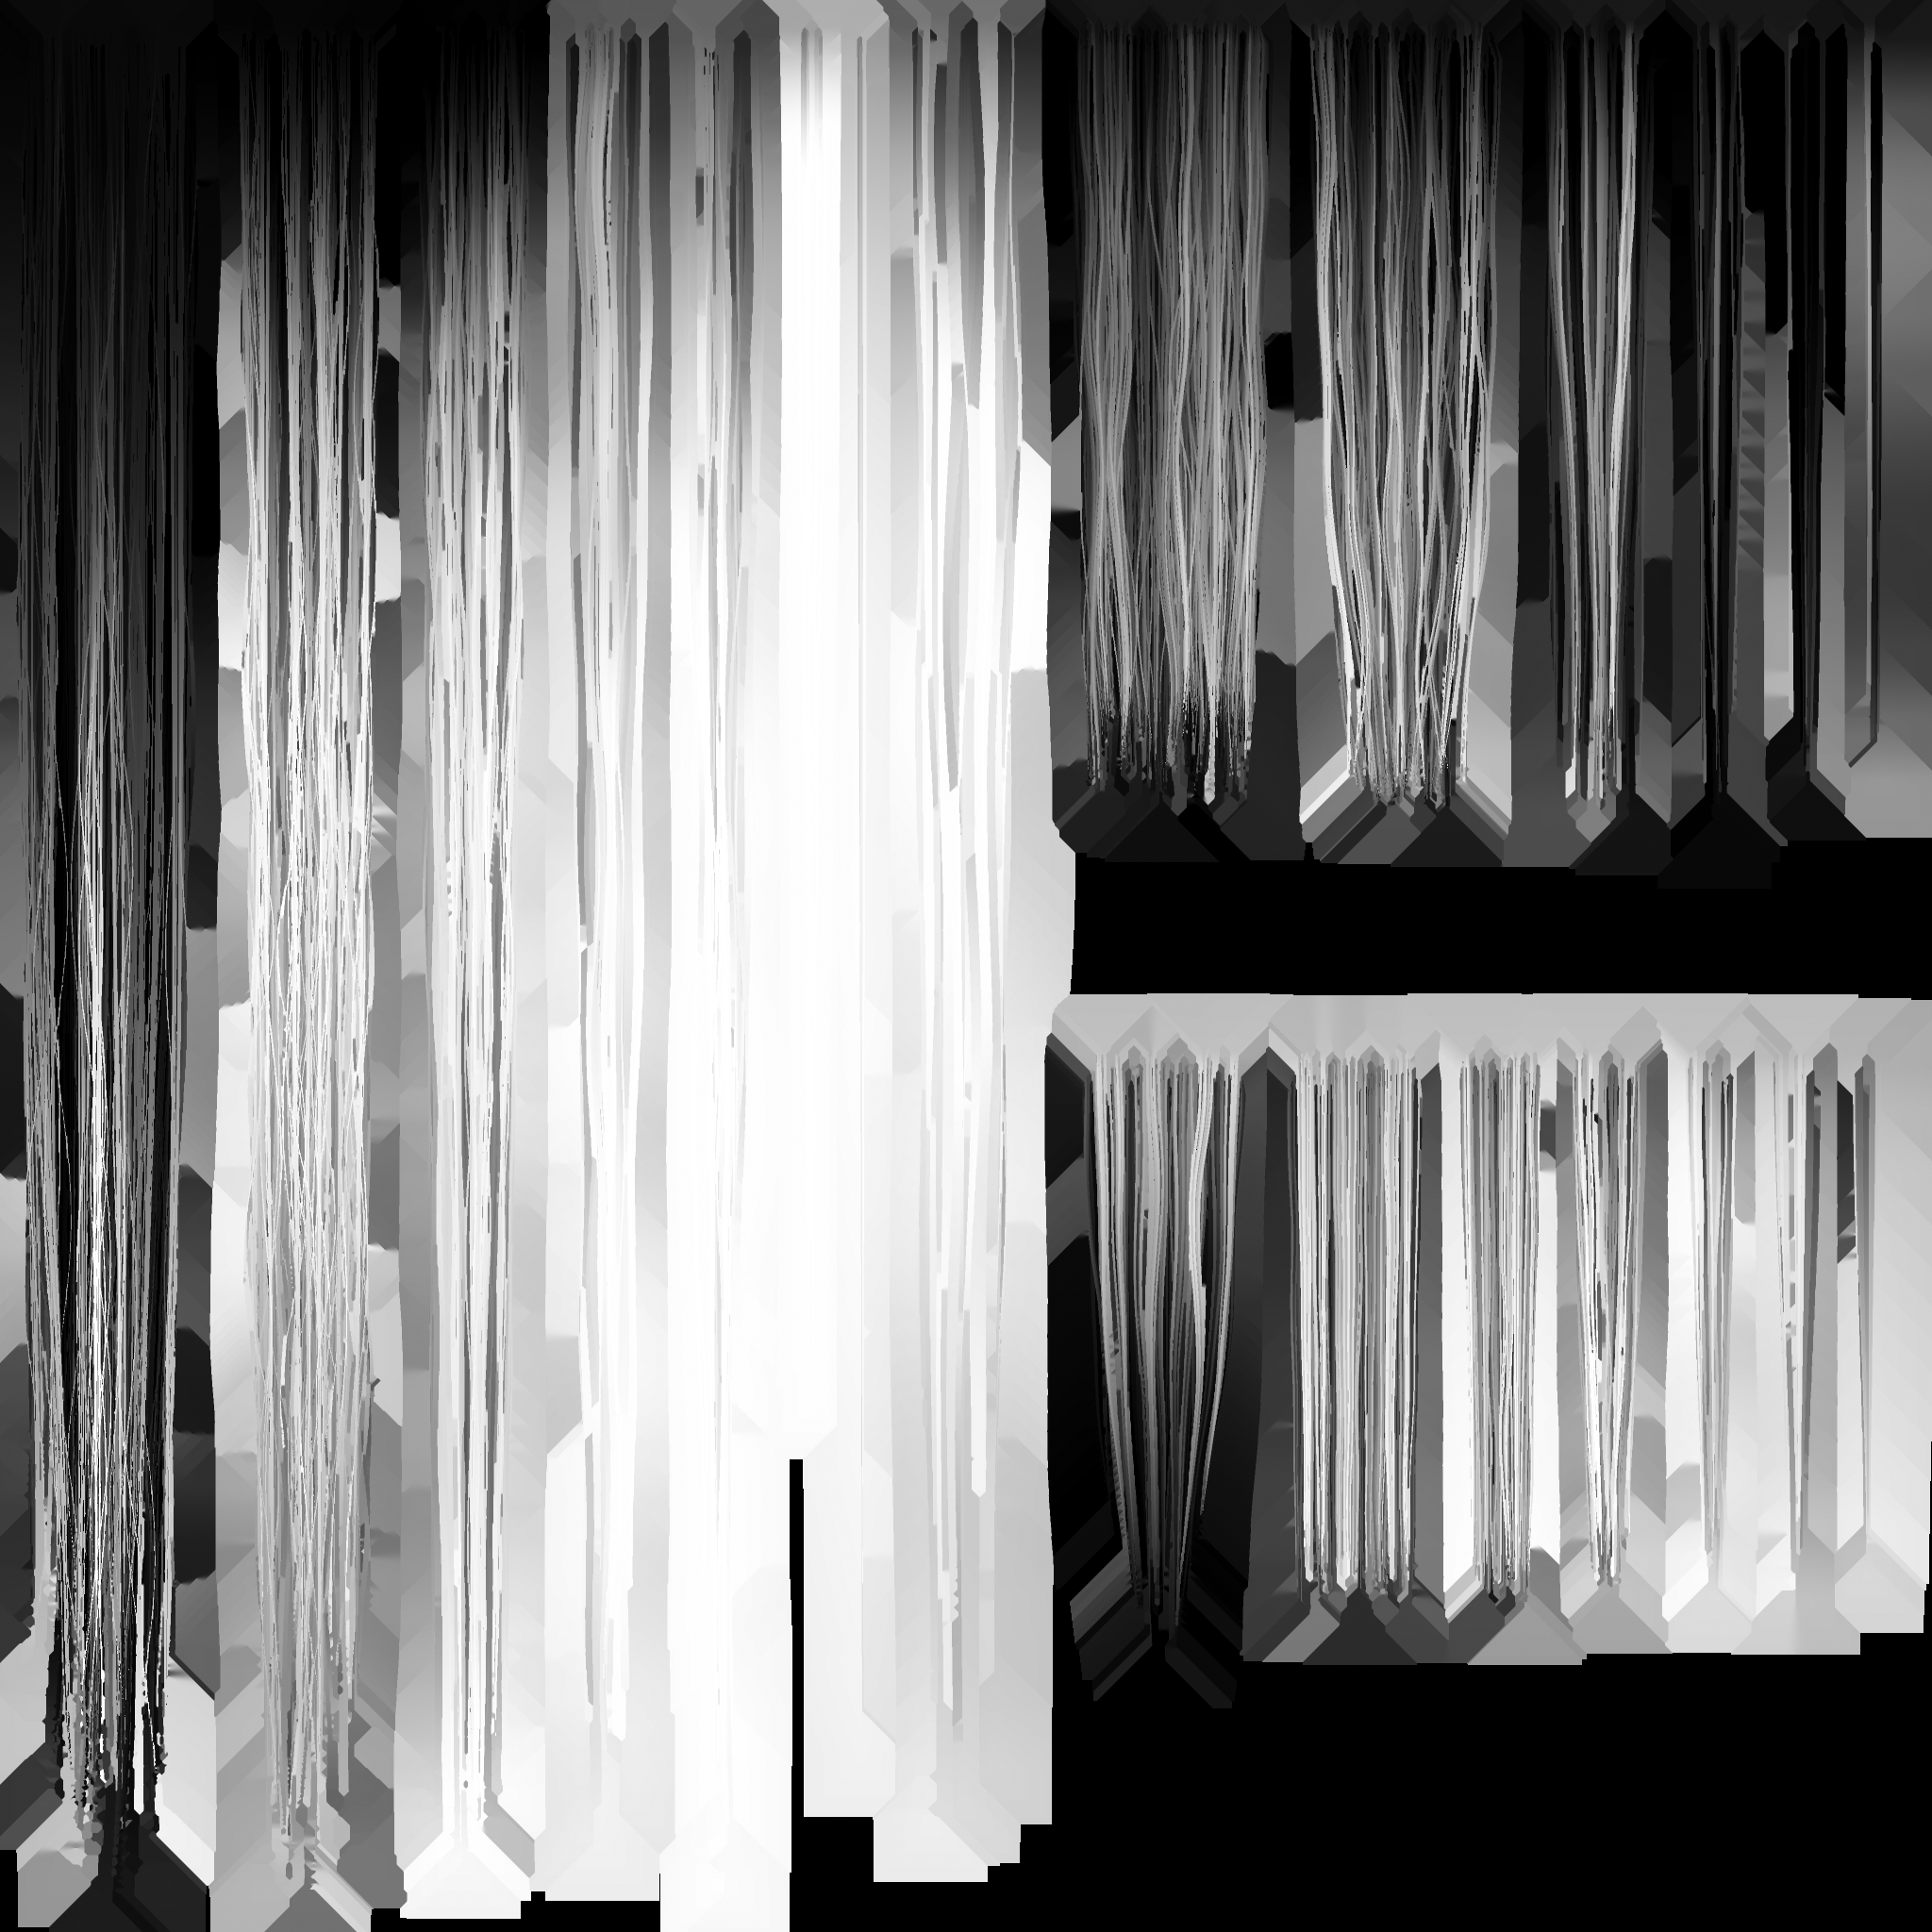
_Shift texture
Standalone texture map containing just the colour ID bake.
The shift map is plugged into the tangent of the hair shader and creates per-strand directional specular lighting variation along the length of the hair.
Scale the finished textures down in PS by 50% of bake size if you baked double.

This should be the final content of your texture maps.
Examples and comparison cases
A hand painted root mask and a hair strand gradient root mask from Ornatrix.
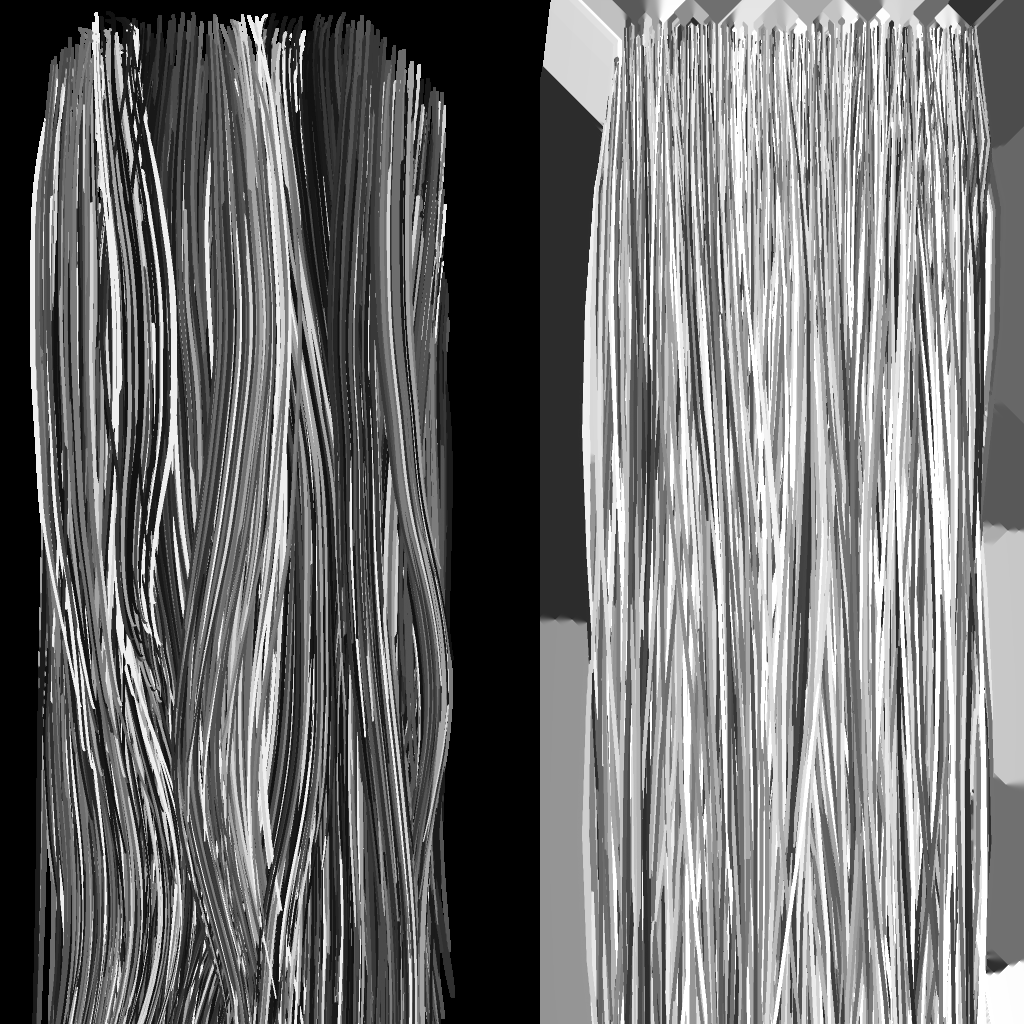
Differences in strand vertex color randomization in Zbrush and 3ds Max (hair made with Ornatrix). You can also import the hair mesh into Max (good luck loading in those millions of polys though) and apply the right-size ID randomization with the Data Channel modifier and assign color by element to get the right-side outcome, but the Zbrush solution should be perfectly fine.
Asset examples from other projects, made with Ornatrix:

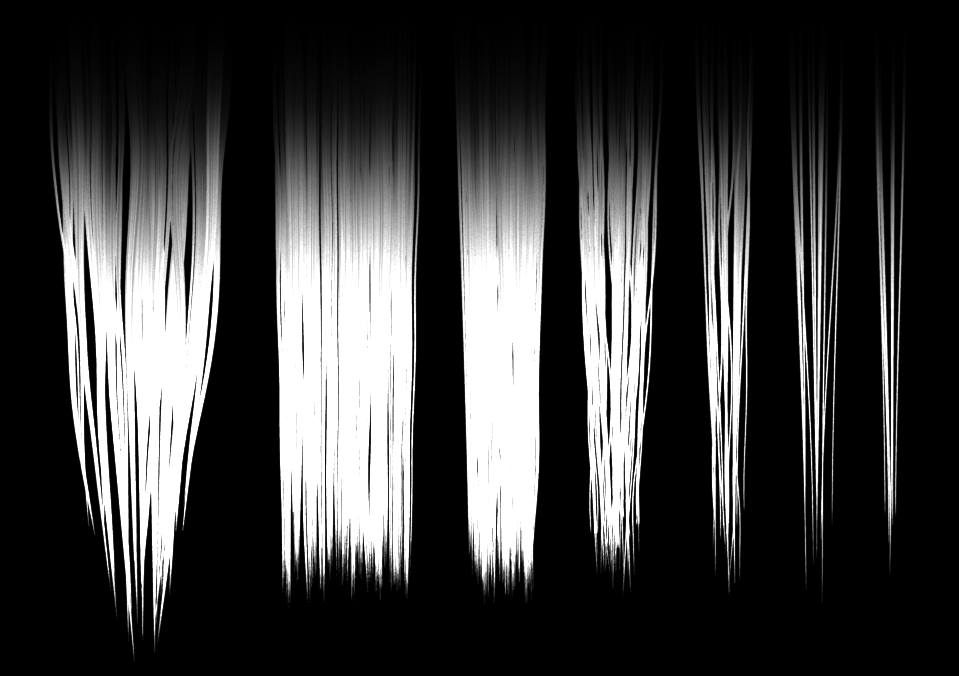
Basecolor and depth maps from Project Steinbit.
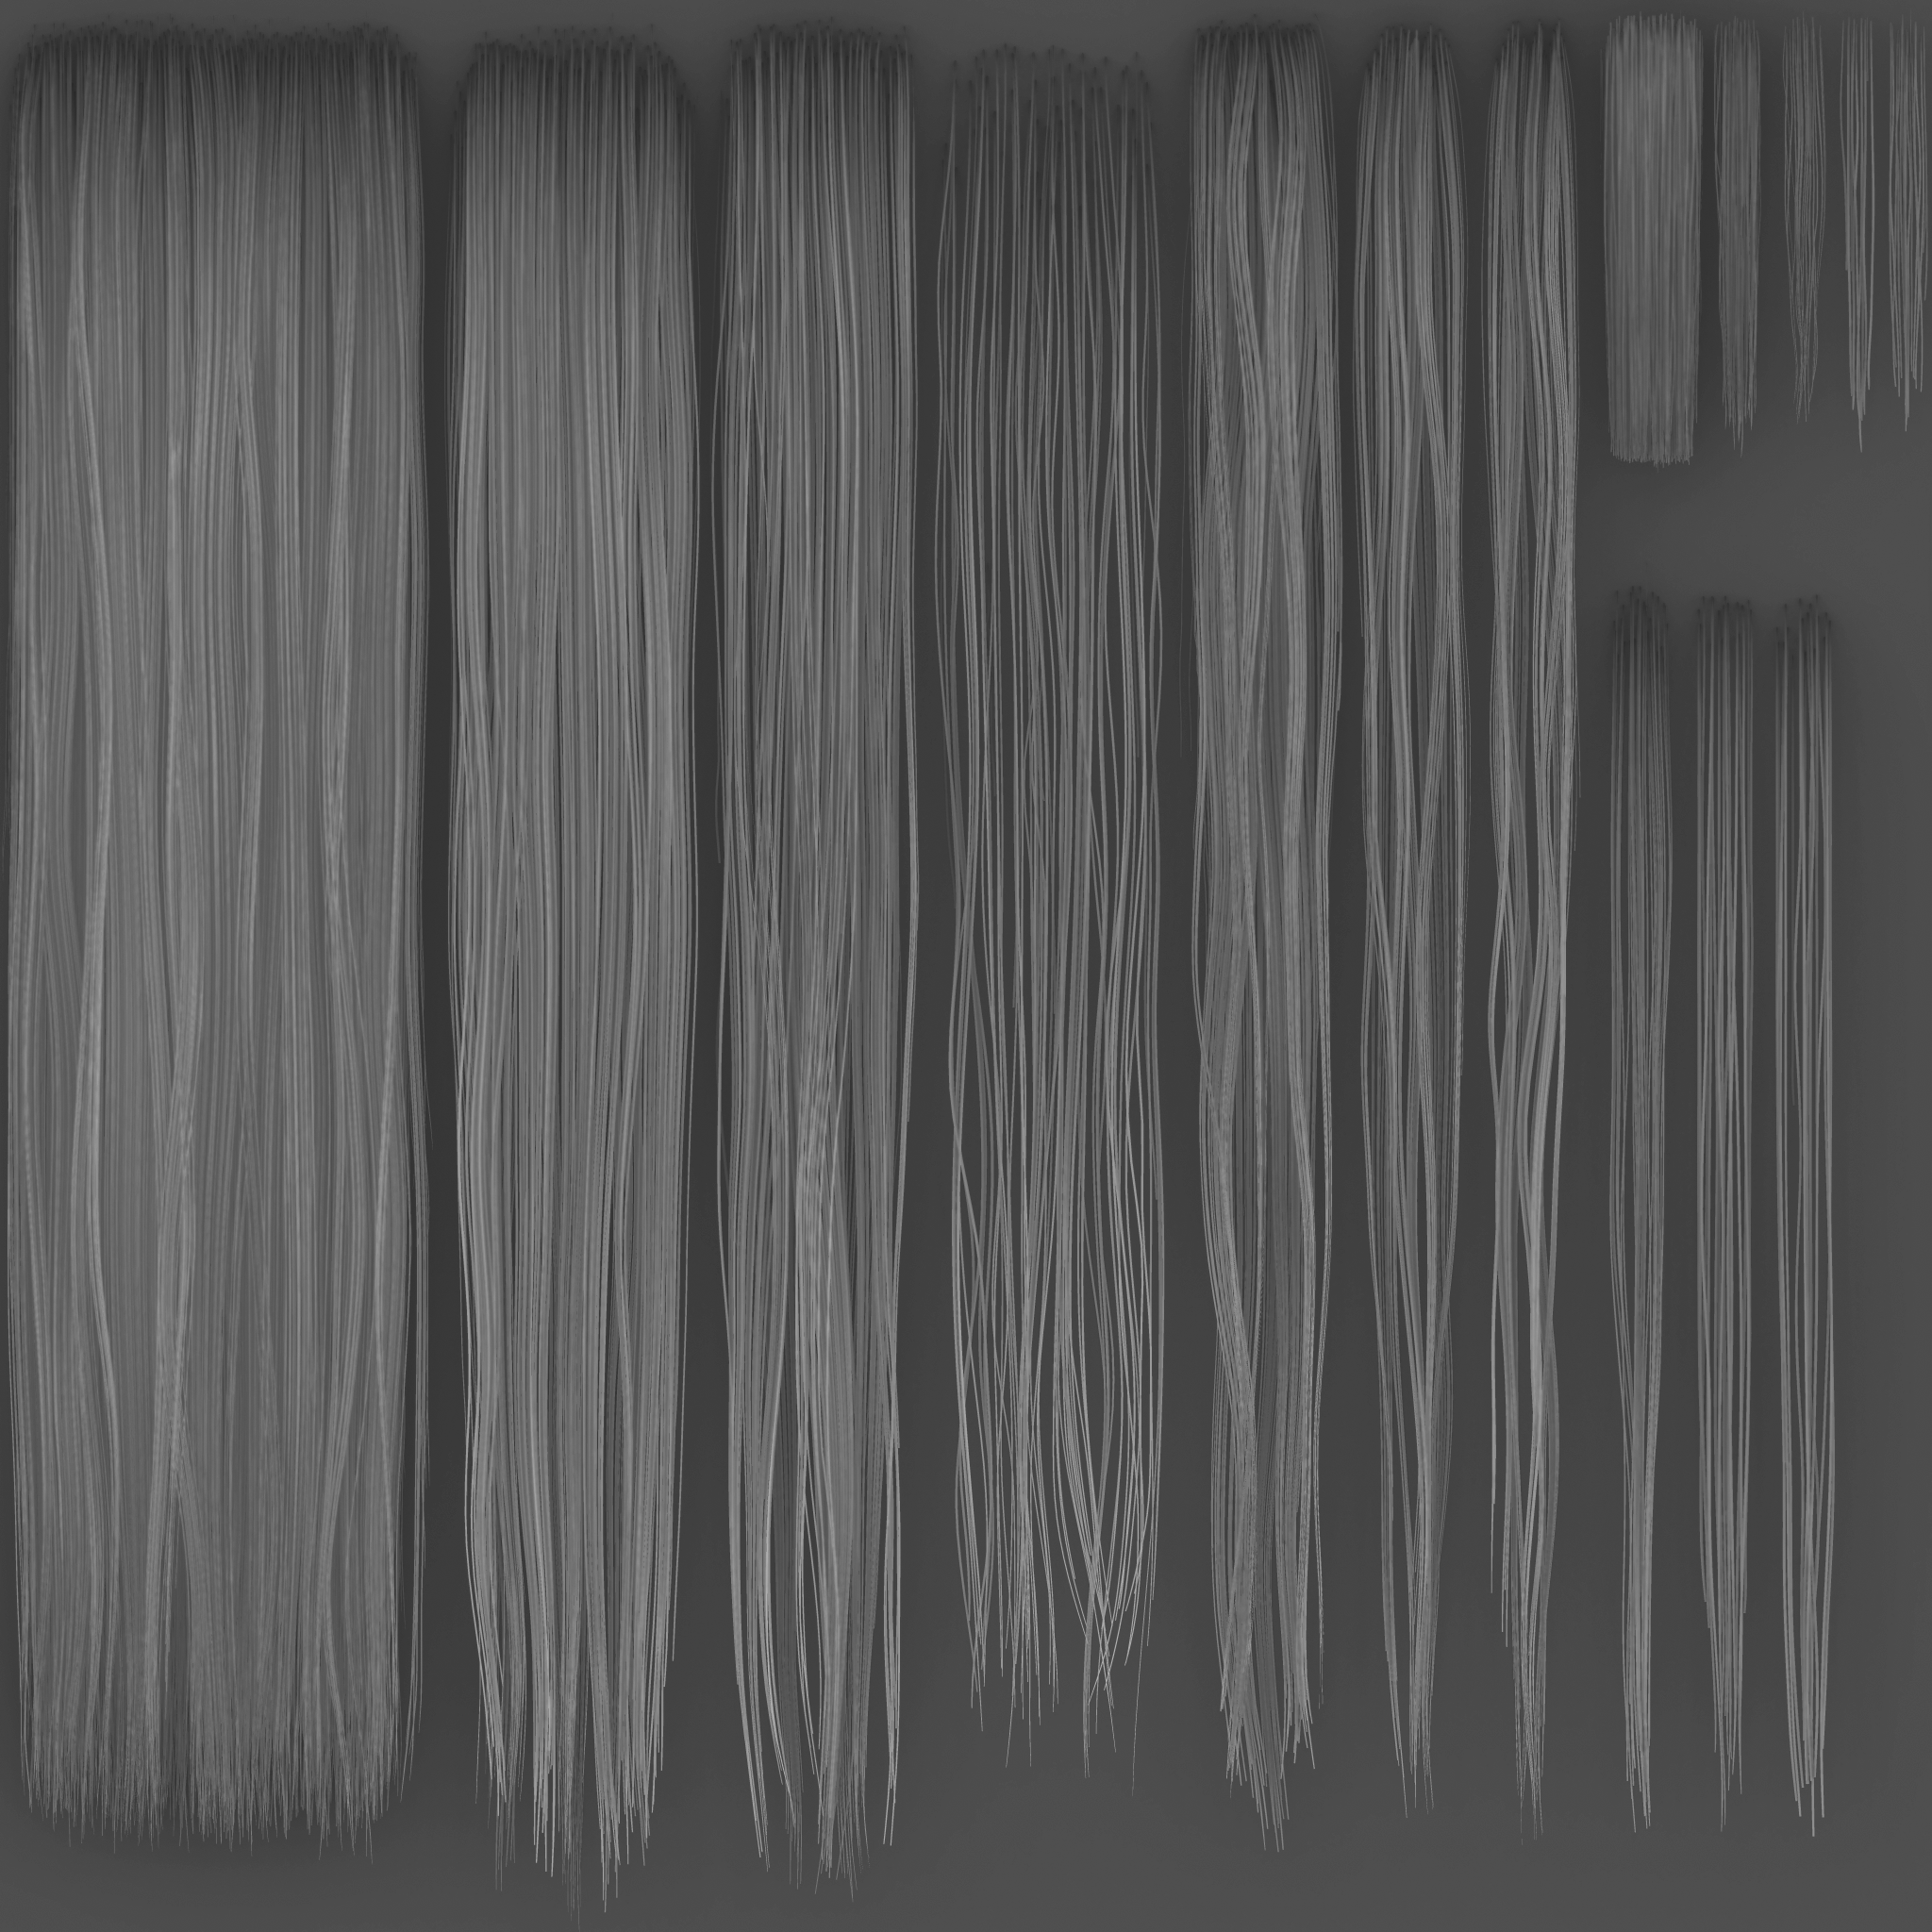
Long straight hair basecolor and depth maps maps from Steinbit.
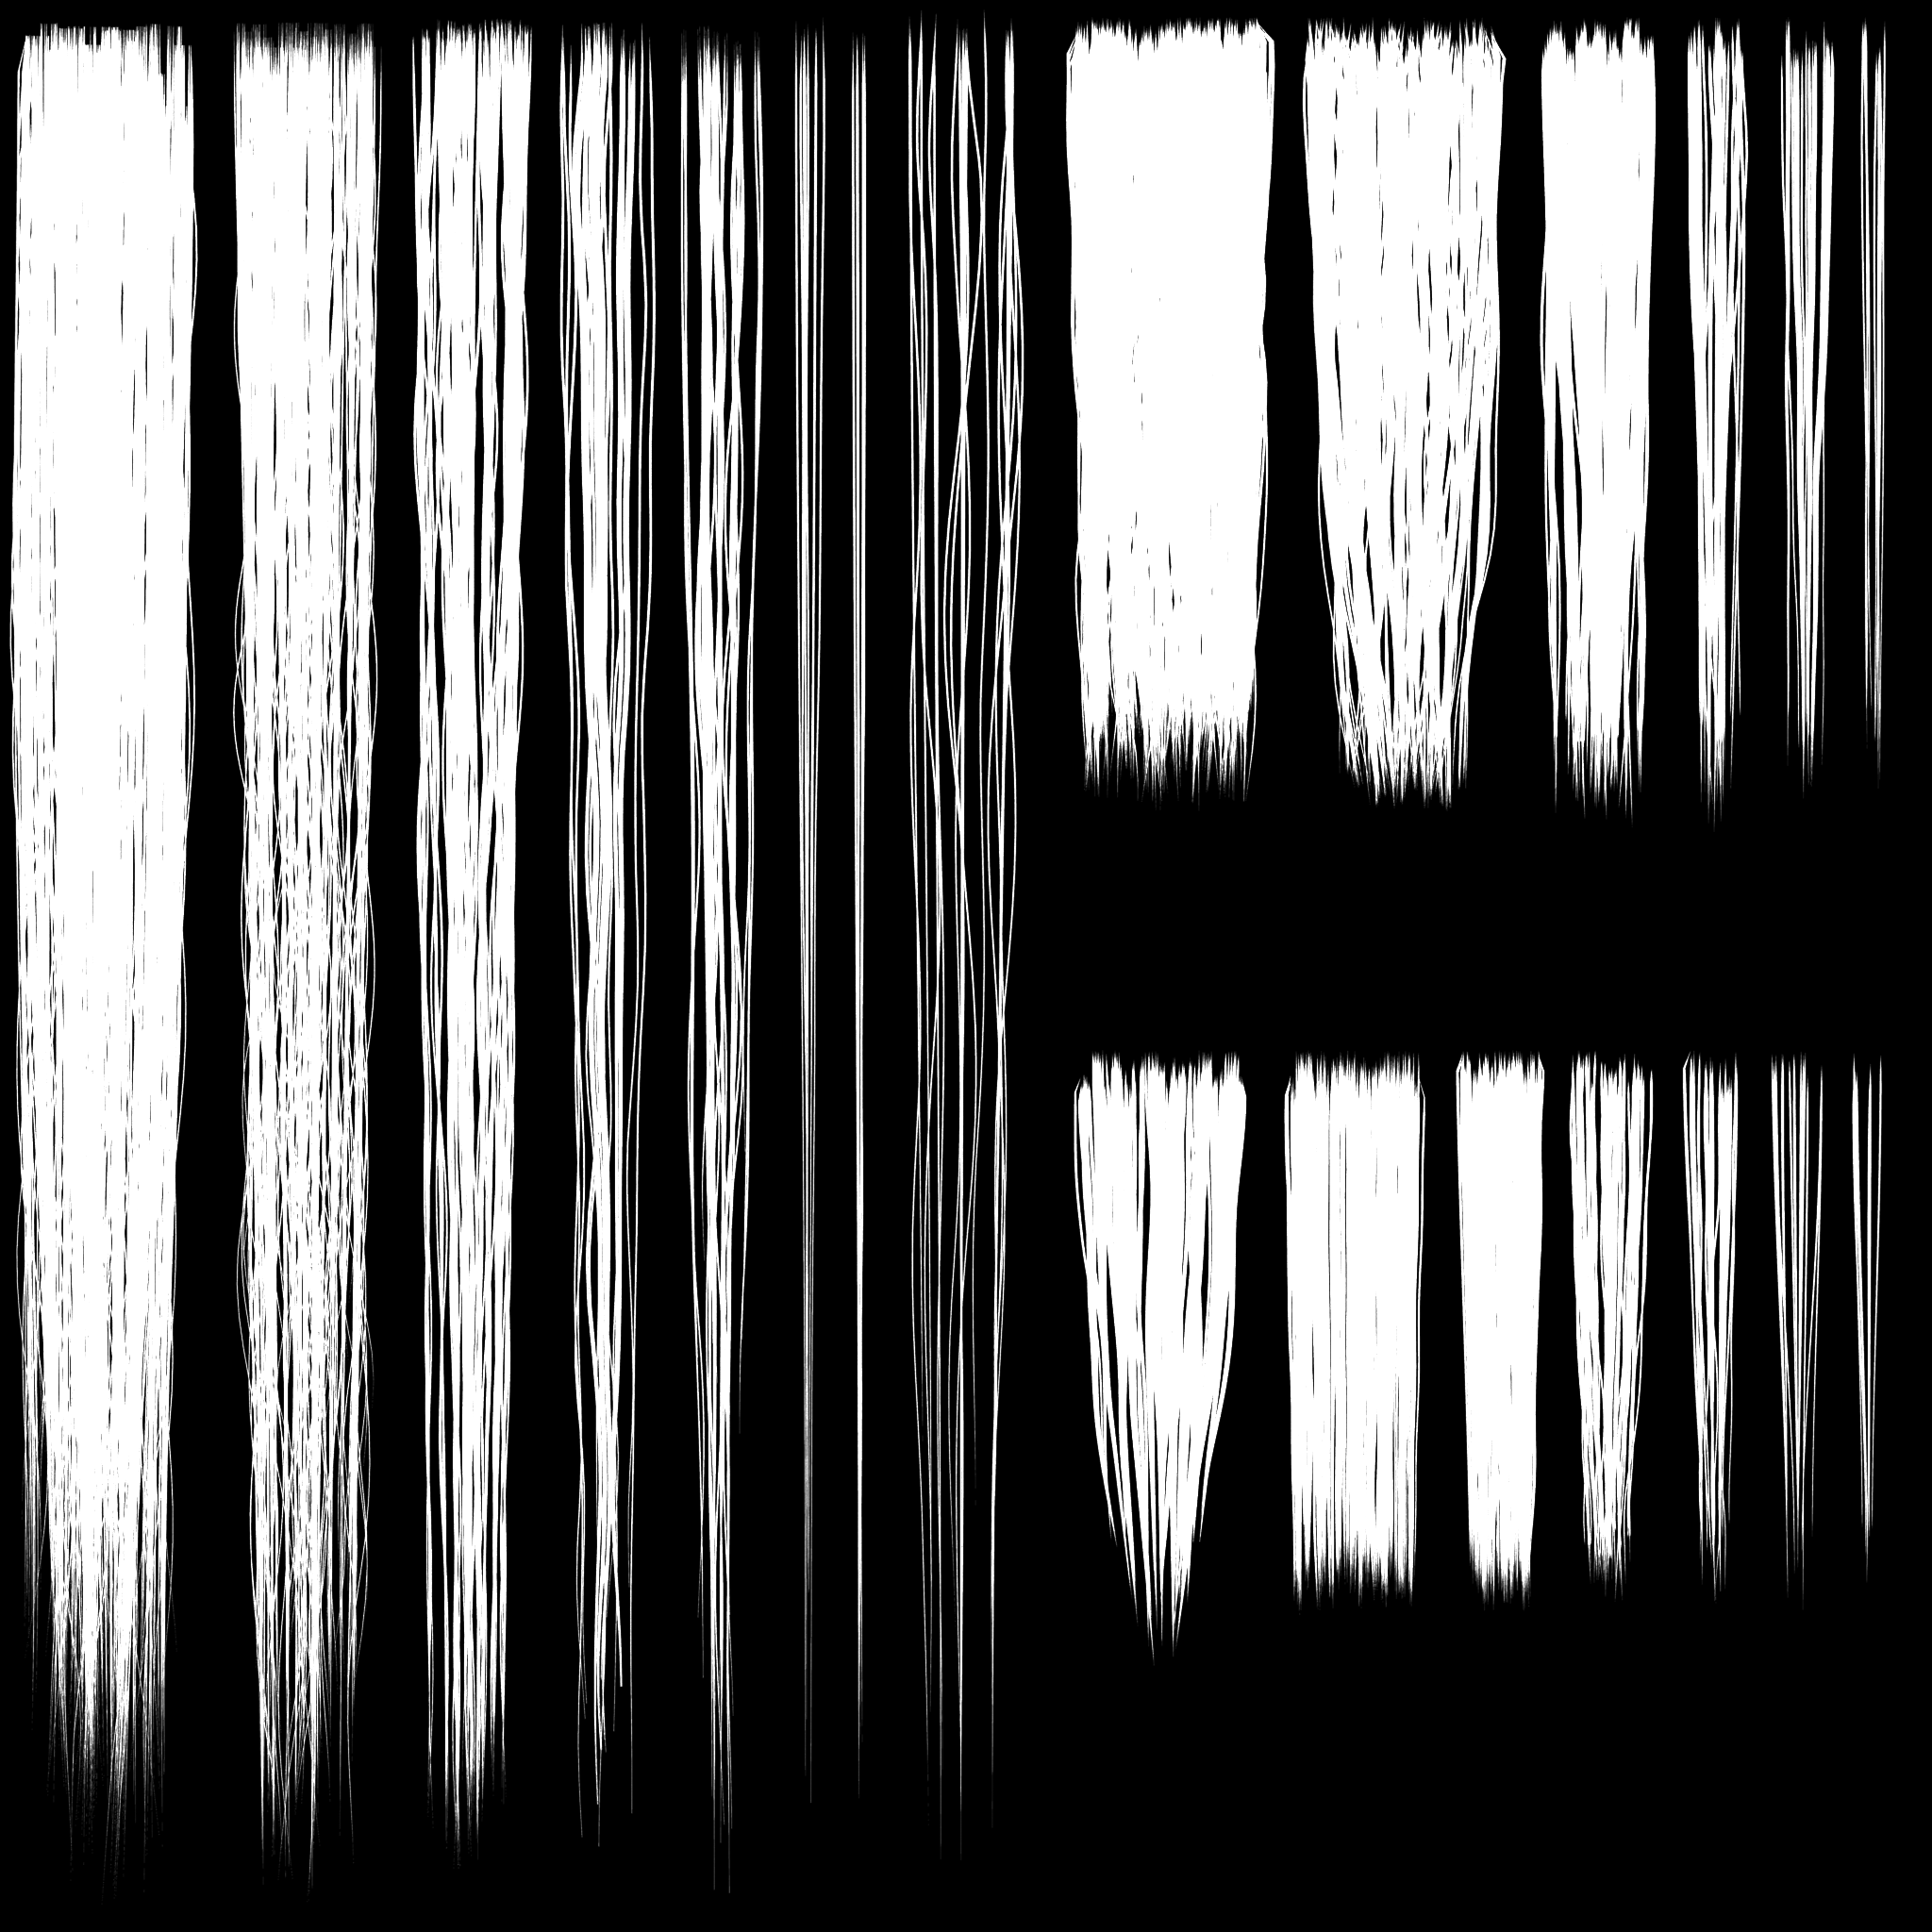
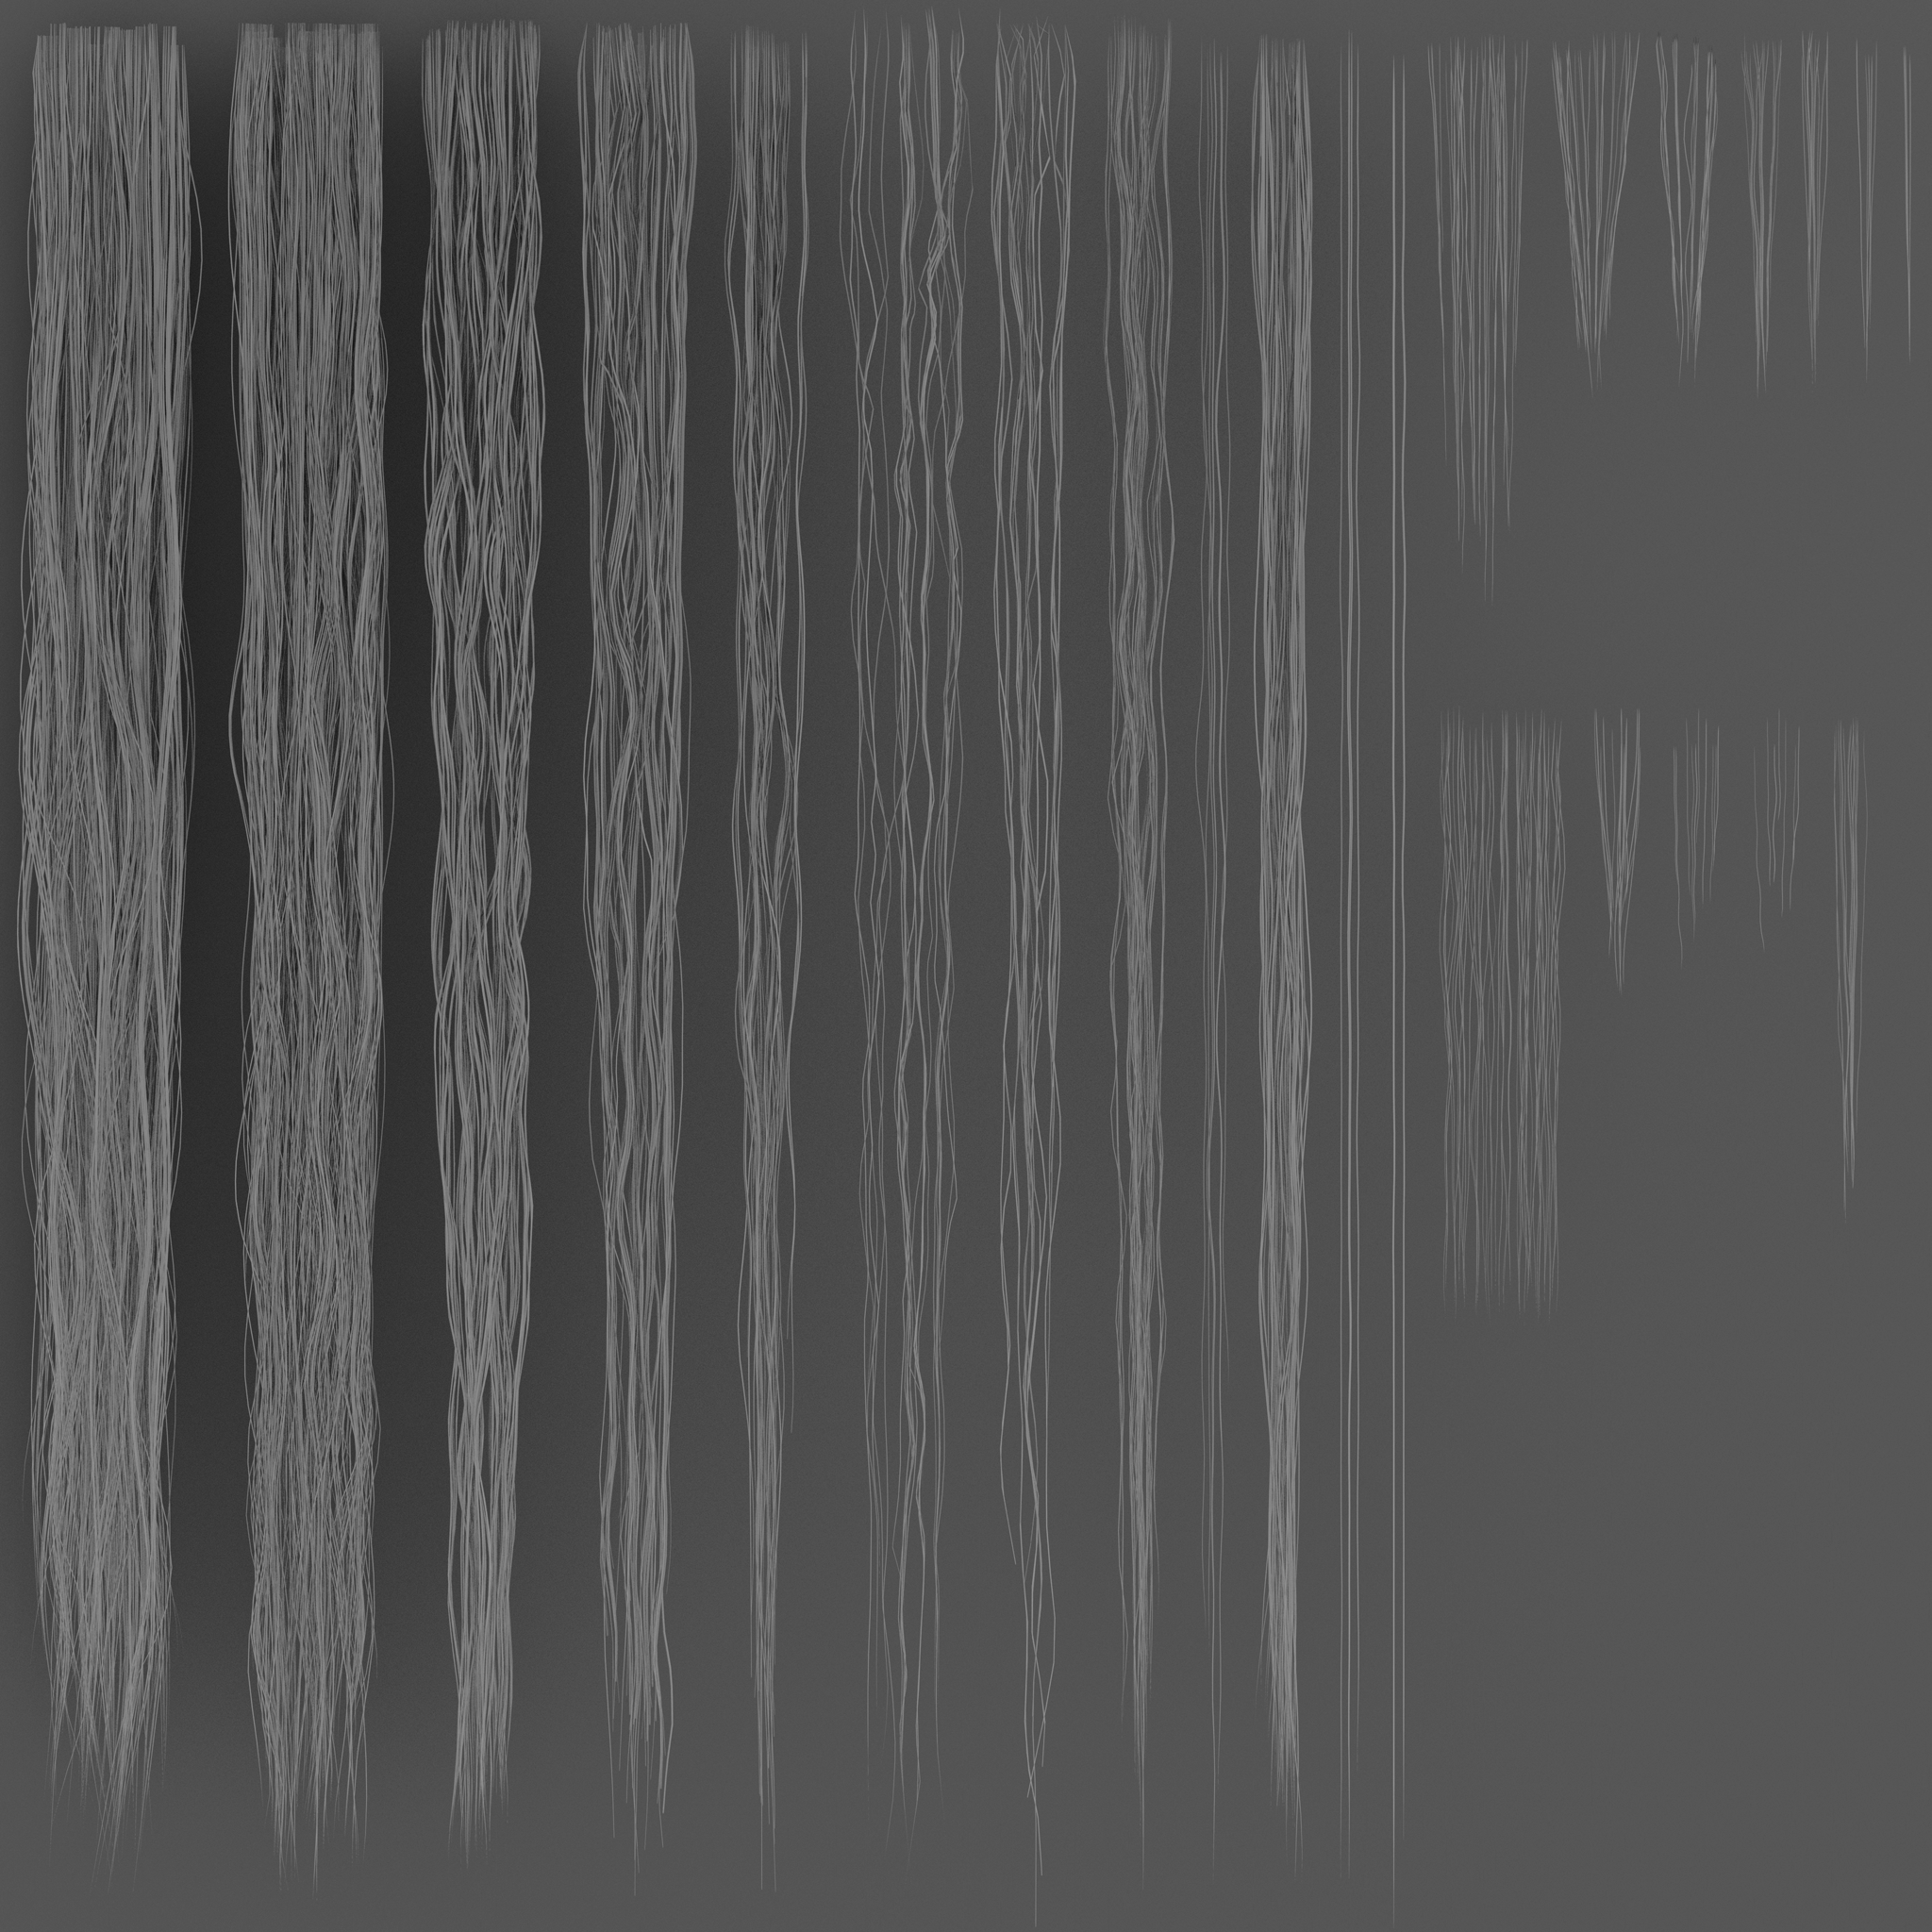
BAD example - hair strands were too thin and did not render cleanly. Notice the amount of hair being lost to pixelation. Hair should have been authored with thicker strands. Hair thickness between chunks is inconsistent. This was clearly made in a rush.