Blockout mesh
Hair card brush kit & card placement
Cleanup and UVs in 3ds Max, placing additional cards with splines
Normal projection for smoother shading
Physics meshes
Zbrush
Prep for hair modeling & blockout sculpt
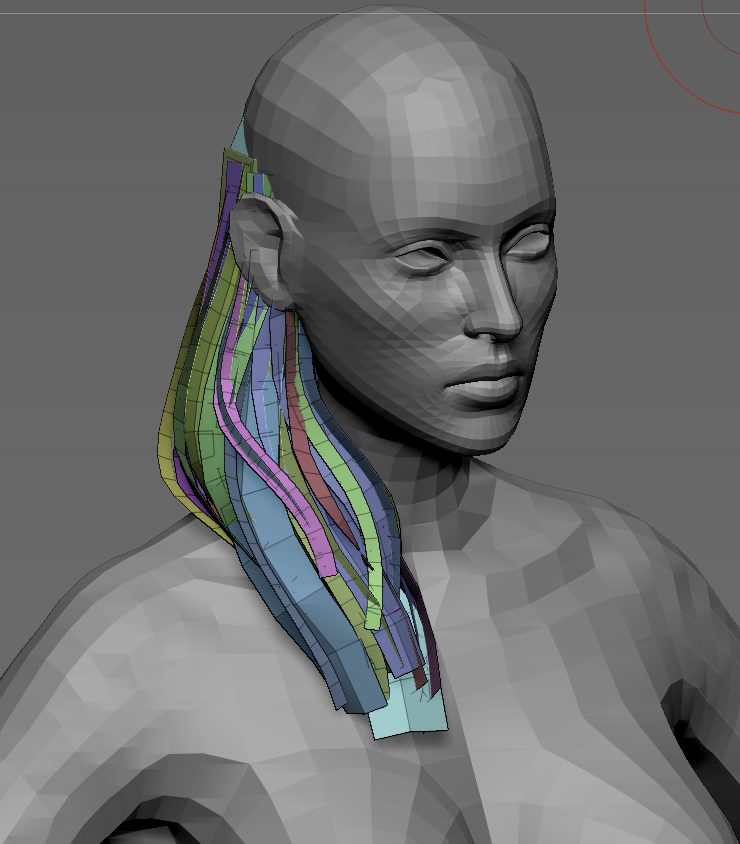
Load in the character base model from at least chest up, preferably the whole body and head. It helps keep hairstyles in proportion as you work.
With your concept and/or reference at hand, sculpt a rough blockout shape that describes the main forms of the hair, silhouette, and particularly the framing of the face. This should land as close as possible to the concept and will be your guideline for laying out cards. Focus on primary shapes with some guidelines for secondary shapes placed in if necessary for the design. Pay particular attention to the hairline and partings on the scalp, as those are very noticeable on the final model. Avoid going into subdivisions - Dynamesh should get you most of the way.
For hair elements with a lot of volume, consider sculpting them separately out of CurveTubes or blobs, as you’ll want to be able to draw in hair card strips from multiple angles to build up volume. It also gives you more control ove rthe
Sorry for the abrupt audio cut at the start of the video! I recorded video and audio separately and botched trimming the voiceover recording :|
The hair card insert brush kit & card placement
Brush kit can be found in the P4 hair tool folder: ConanSandbox\Assets\Content\Characters\Outsource\Hair\
Note that you are 100% free to set up your own hair card creation tools. This is just here for your convenience, as these are tried and tested! The upside of it is that it gives you a ton of artistic control. The downside of this card kit is that you’ll have to UV them manually each time after placing them, so if you want to use a different method to place pre-UVed cards, go ahead.
Cleanup in 3ds Max, UVs, spline based card placement
Weld, group and export your cards out of Zbrush. You can use UV Master to auto-UV from polygroups in Zbrush as a starting point. You should have a prepared texture sheet ready, and I’m going to use an existing one from project Steinbit.
Here I’ve done quick UVs based on polygroup from UV Master. 3ds Max can be temperamental about straightening UVs that have been mapped with its own native auto unwrap and usually requires planar projections for aligning edges. It’s just easier to hit UV master unwrap in Zbrush up-front.
You’ll probably end up revising your hair mesh a lot at the next stage, since up until now we’re kind of guessing how it’ll look.
(oh god damnit my resolution settings were off for recording this!! sorry, I hope it’s still clear)
TLDR:
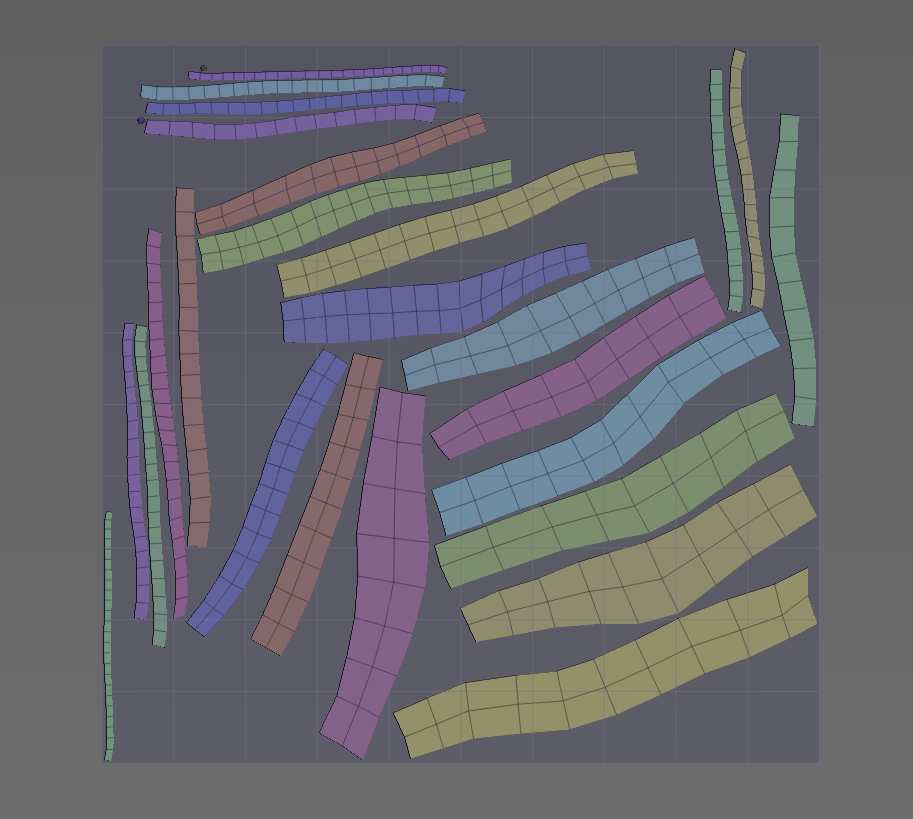
Straighten your UVs, check that they are in top-down root-to-tip orientation, and place them on your texture sheet with alpha as your reference.
Check your hair model with textures enabled and in HQ rendering mode and patch up noticeable gaps, tweak awkward shapes and clean up geo density, optimize if you have very high poly strips. Paint Deform with vertex selection masking on hair elements helps this process significantly.
Add in any additional hair card geometry either by duplicating existing geometry or using Spline placement on straight flat cards (for fine control) to position new geometry.
Export to UE4 once in a while and check with textures and materials to see how it’s coming together.
Normal projection for smoother shading between cards
If you notice a lot of harsh shading transitions across cards, especially on hair that’s supposed to be very slick and even, you can project normals from a blob mesh shaped like the overall form of the hair with NoorsNormalThief. This isn’t always necessary or desirable, but in many cases it can improve the look of your hair when shaded.
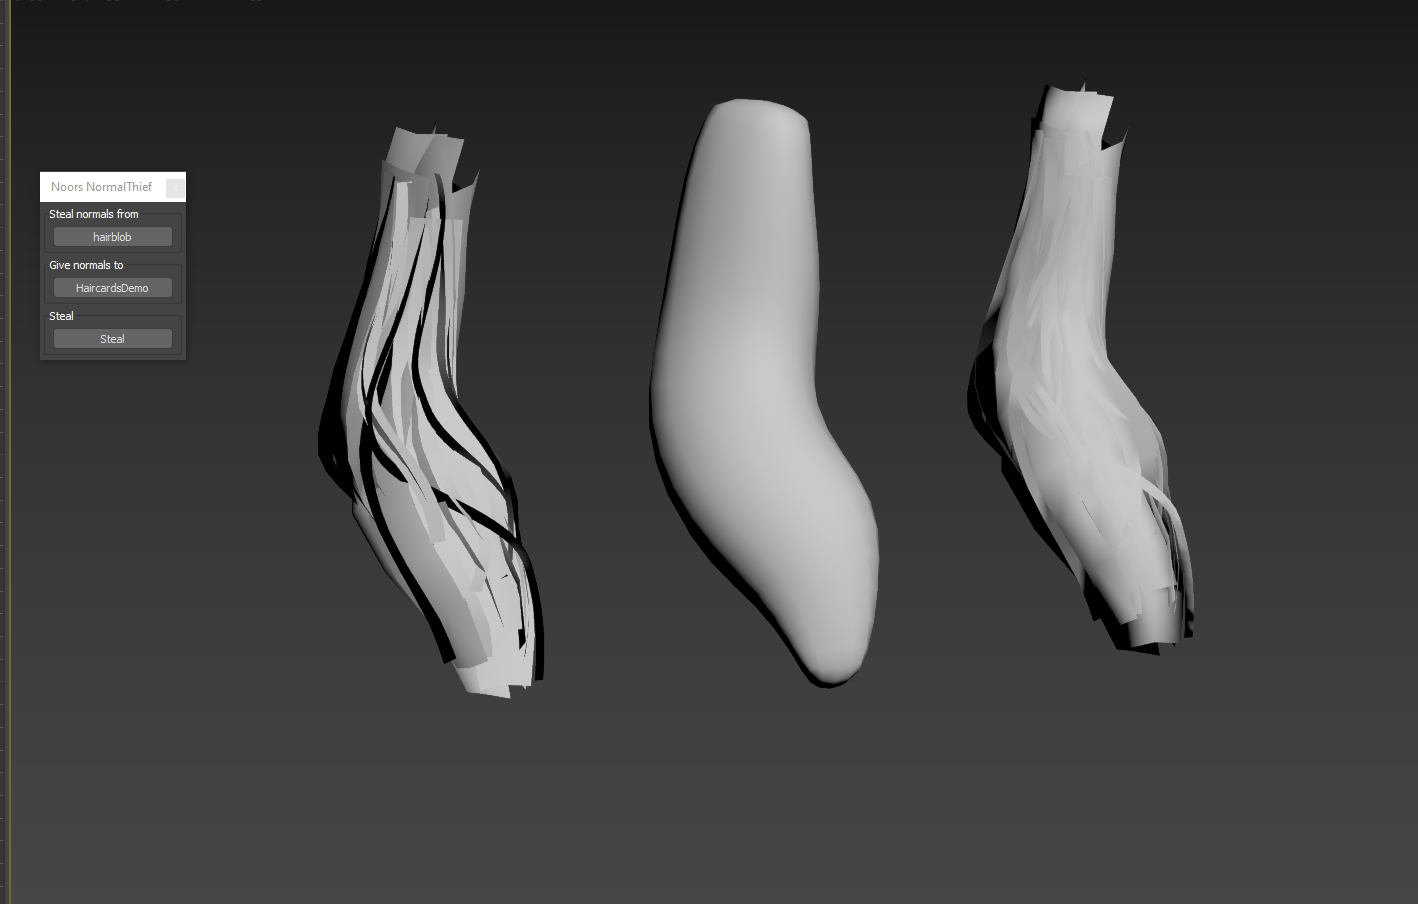
Hair with default normals, blob mesh, projected normals on the same hair. Notice how much smoother and more uniform the shading is. It’s a good idea to check your model with both solutions.
Finally, skin and export the hair. If you made a blob mesh to project smooth normals, you can also use that as a skinning assistant - skin wrap that to the body first, and then skin wrap the hair to the blob mesh.
Create a hair physics mesh (made exactly like a regular cloth physics mesh, just much much lower poly than the hair) and assign it to the model in UE. Fill out hair asset data table and assign a suitable hairline texture that goes on the character’s scalp to block out skin showing through. More on that in the next section on engine implementation.