In order to compensate for decals facing the correct direction when they are projected on multiple surfaces, new Material Functions, Materials, and Blueprint Functions have been created. This page will cover setups and also explain the ways to use this systemin later versions of Unreal since the functionality has been updated.
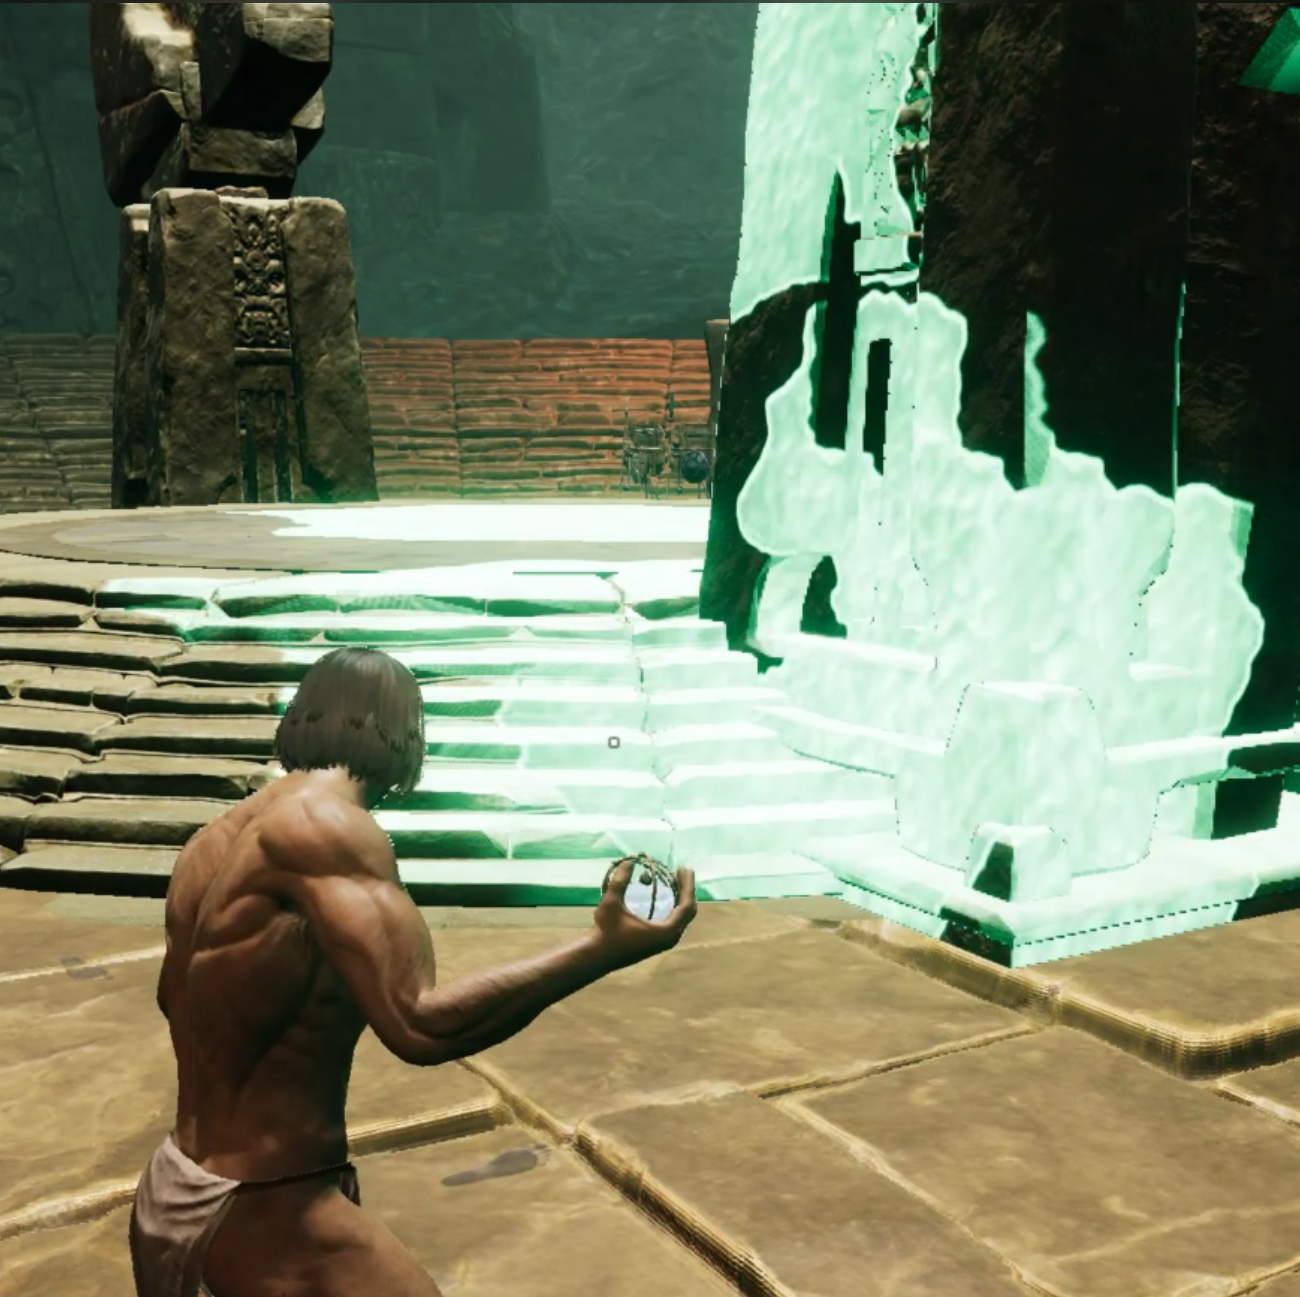
(Example - This example is from an effect of an orb explosion and used to show the effect of this function. The following screenshots are taken from the decal spawned from Zath’s Poison Acid Missile.)
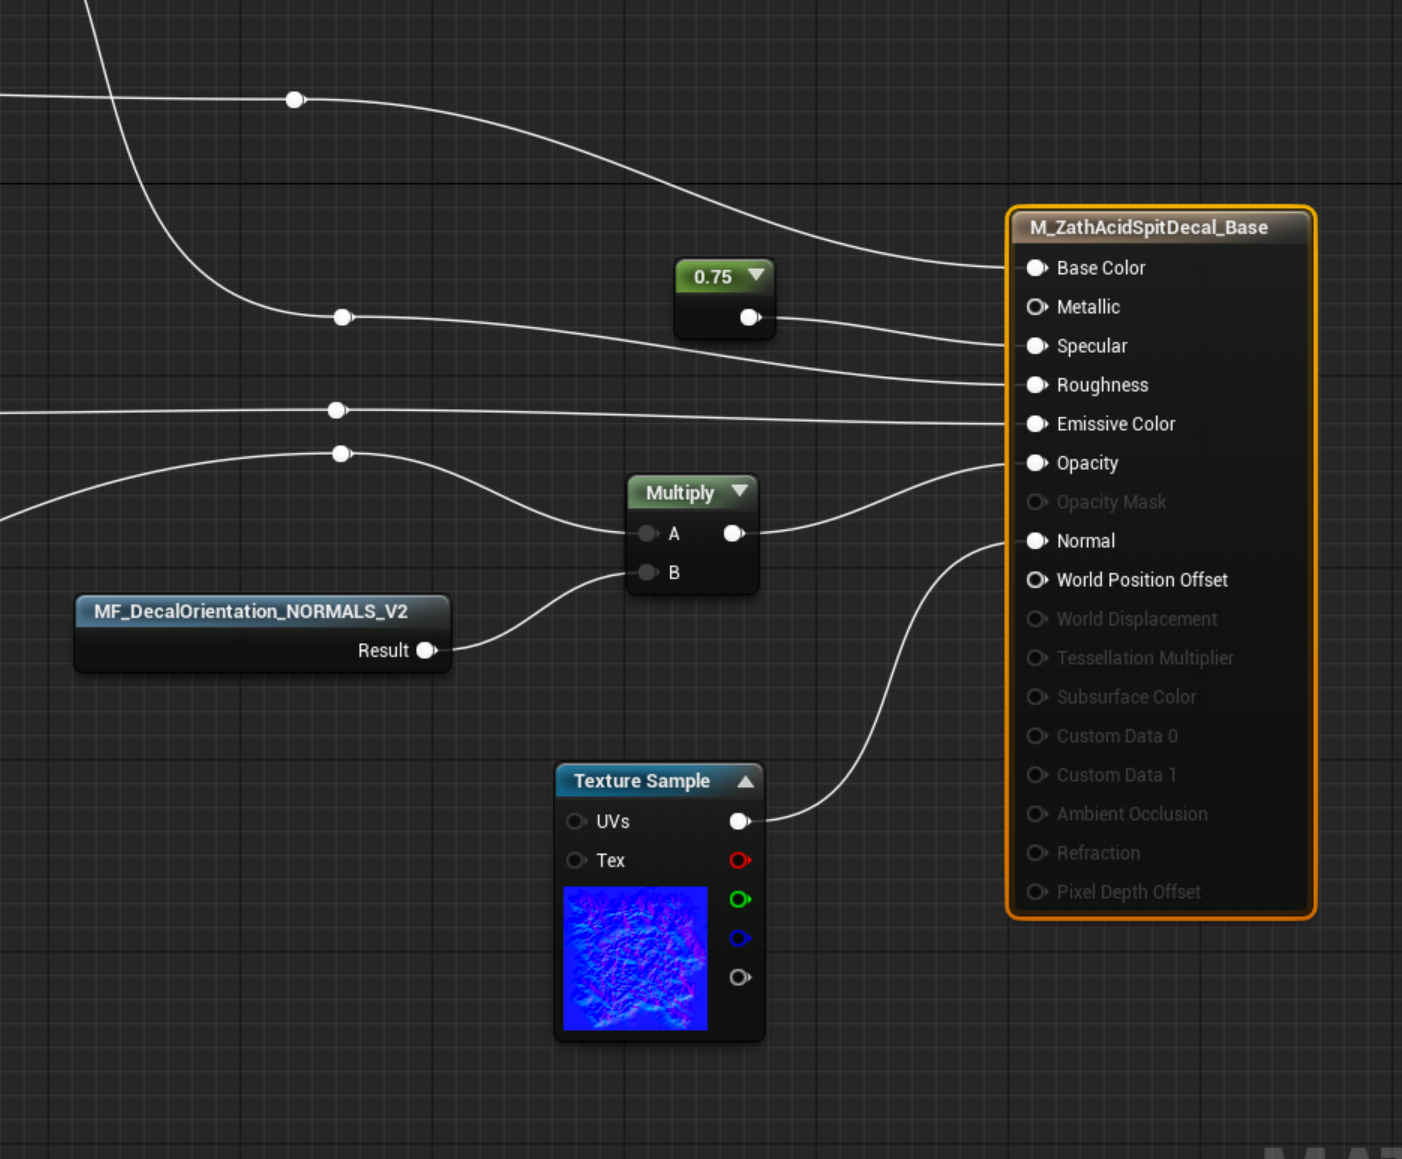
MATERIAL FUNCTION
Unreal Location: Content > VFX > Material_Functions > MF_DecalOrientation_NORMALS_V2
The material function has been setup with a color parameter to define the vector facing axis in the Material Instance.

Below, you will see the “Angle Facing” parameter previously mentioned. Below, in the “Correct Way” comment box, there is an additional way to set this up that would not require the use of the Angle Facing color parameter nor would it require the use of 6 material instances. Instead you could use that setup to accomplish the decal orientation with one Material Instance. However, you cannot use it that way in Unreal 4.15, therefore the only option is to use it with the color parameter.
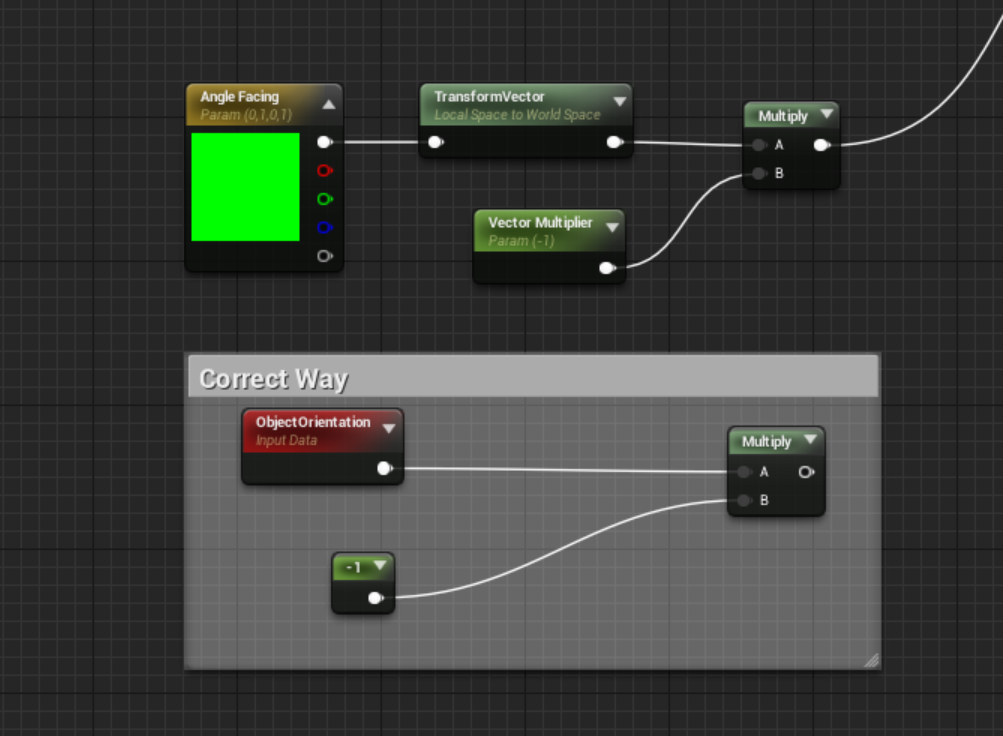
The benefit of this system is that it allows you to use normal maps with the deferred decal system. This is obviously already available in decal materials, but with other methods of correctly spawning decals on multiple axes you lose the normal information. Below is the correct way to hook up the Material Function.
MATERIAL INSTANCES
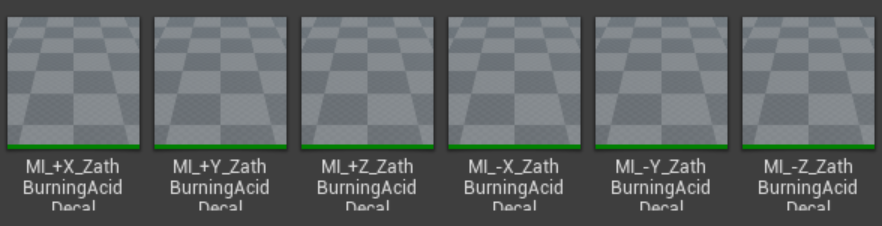
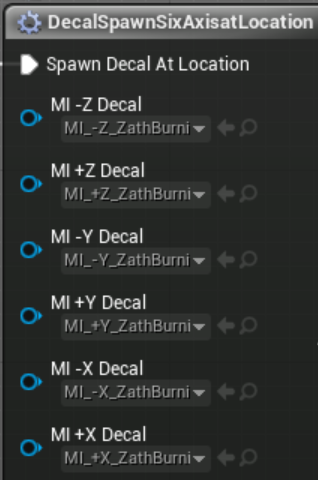
Below are the correct amount of Material Instances needed for all 6 axis spawns based off of the BASE Material. It is important to label them correctly with the vector direction listed first.
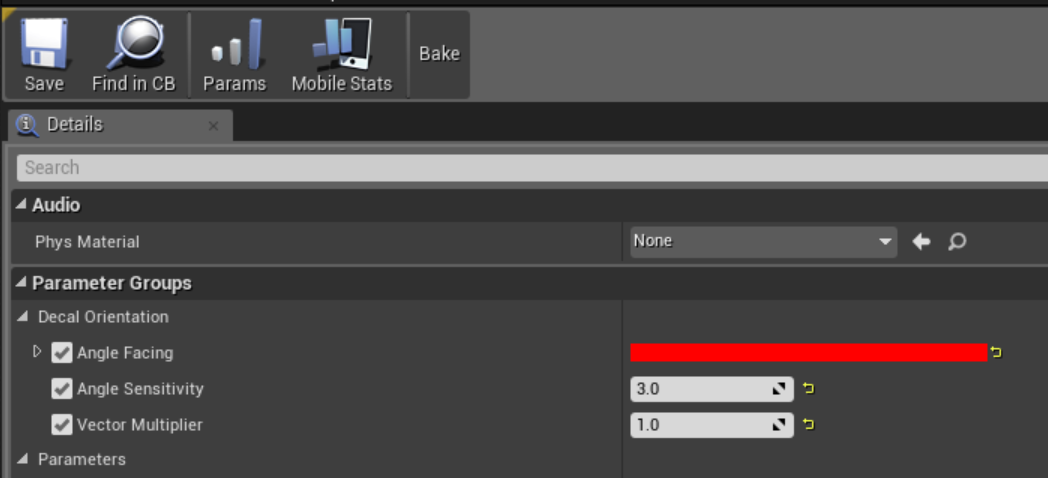
Below is an example of the +X facing decal. Note that the color is set to R>1, G>0, B>0. The Vector Multiplier is set to 1 since it is facing in the positive X direction.
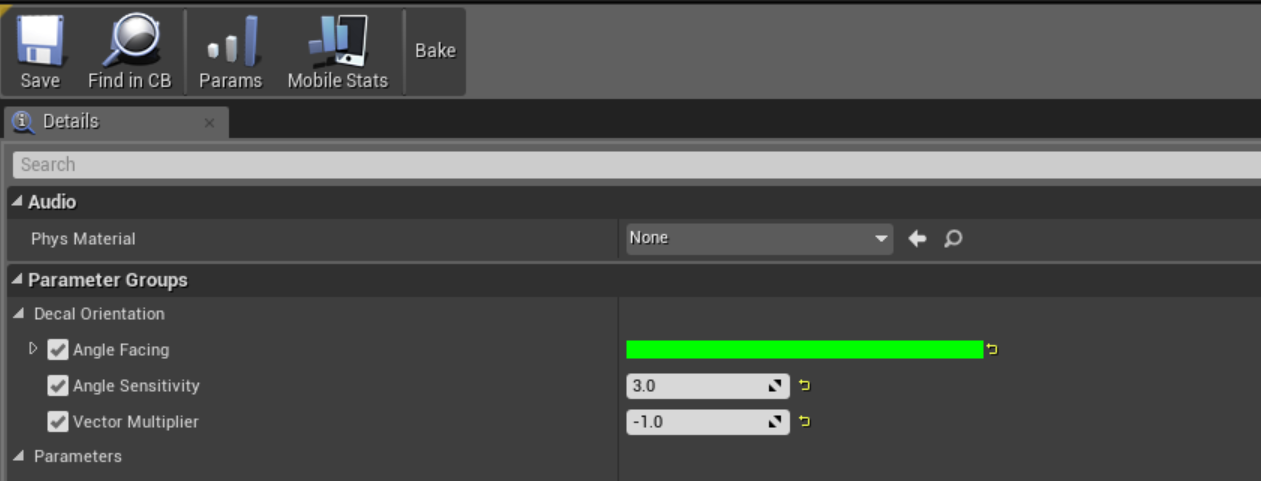
Below is an example of the -Y facing decal. Note that the color is set to R>0, G>1, B>0. The Vector Multiplier is set to - 1 since it is facing in the negative Y direction. All Vector Multipliers will be either 1 or -1 .
BLUEPRINT FUNCTION/MACRO LIBRARIES
Each Decal Function or Macro currently sits in it’s respective library. Currently there is no Function created for the 6 Axis Decal Spawn, but there is a Macro. A Function should be built out in the future.
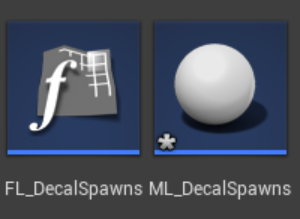
Unreal Location: Content > VFX > Blueprints > FL_DecalSpawns
Content > VFX > Blueprints >ML_DecalSpawns
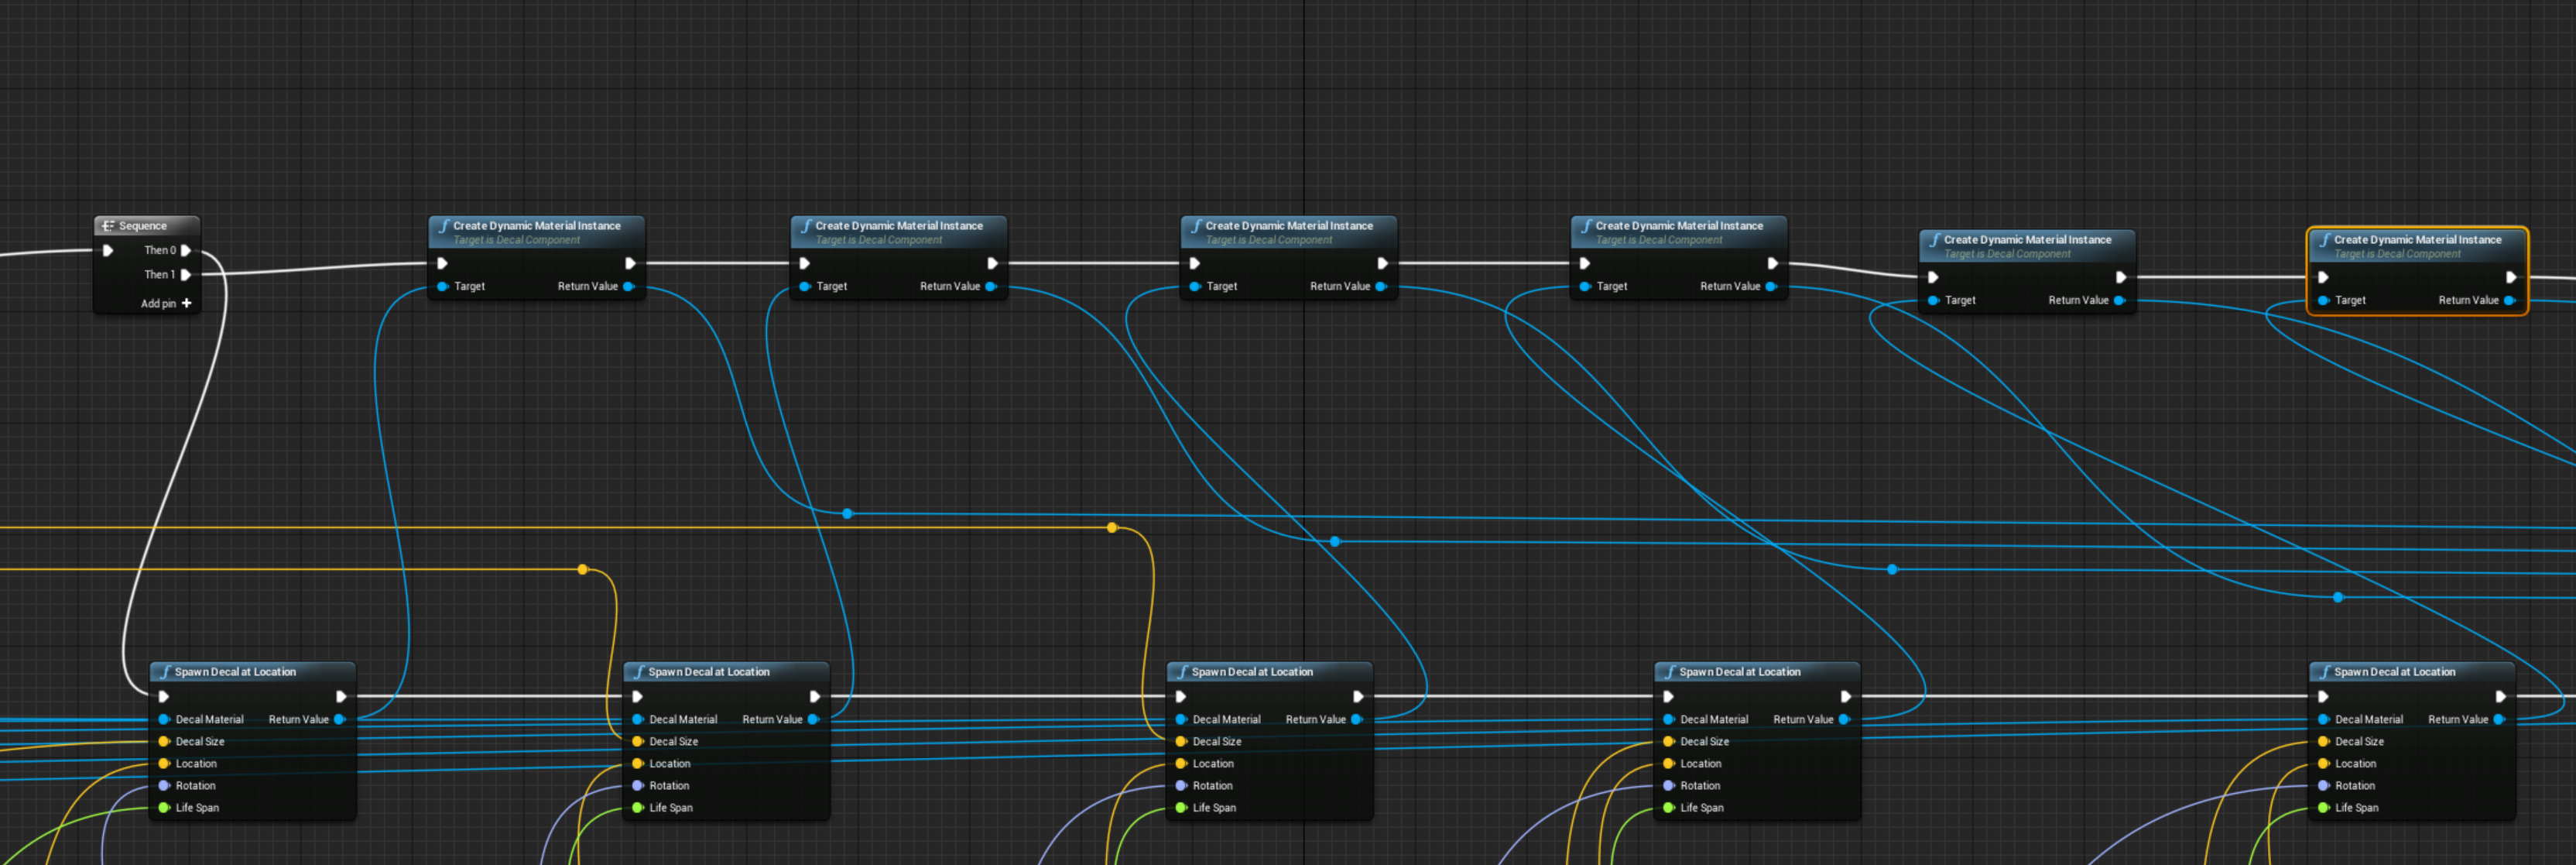
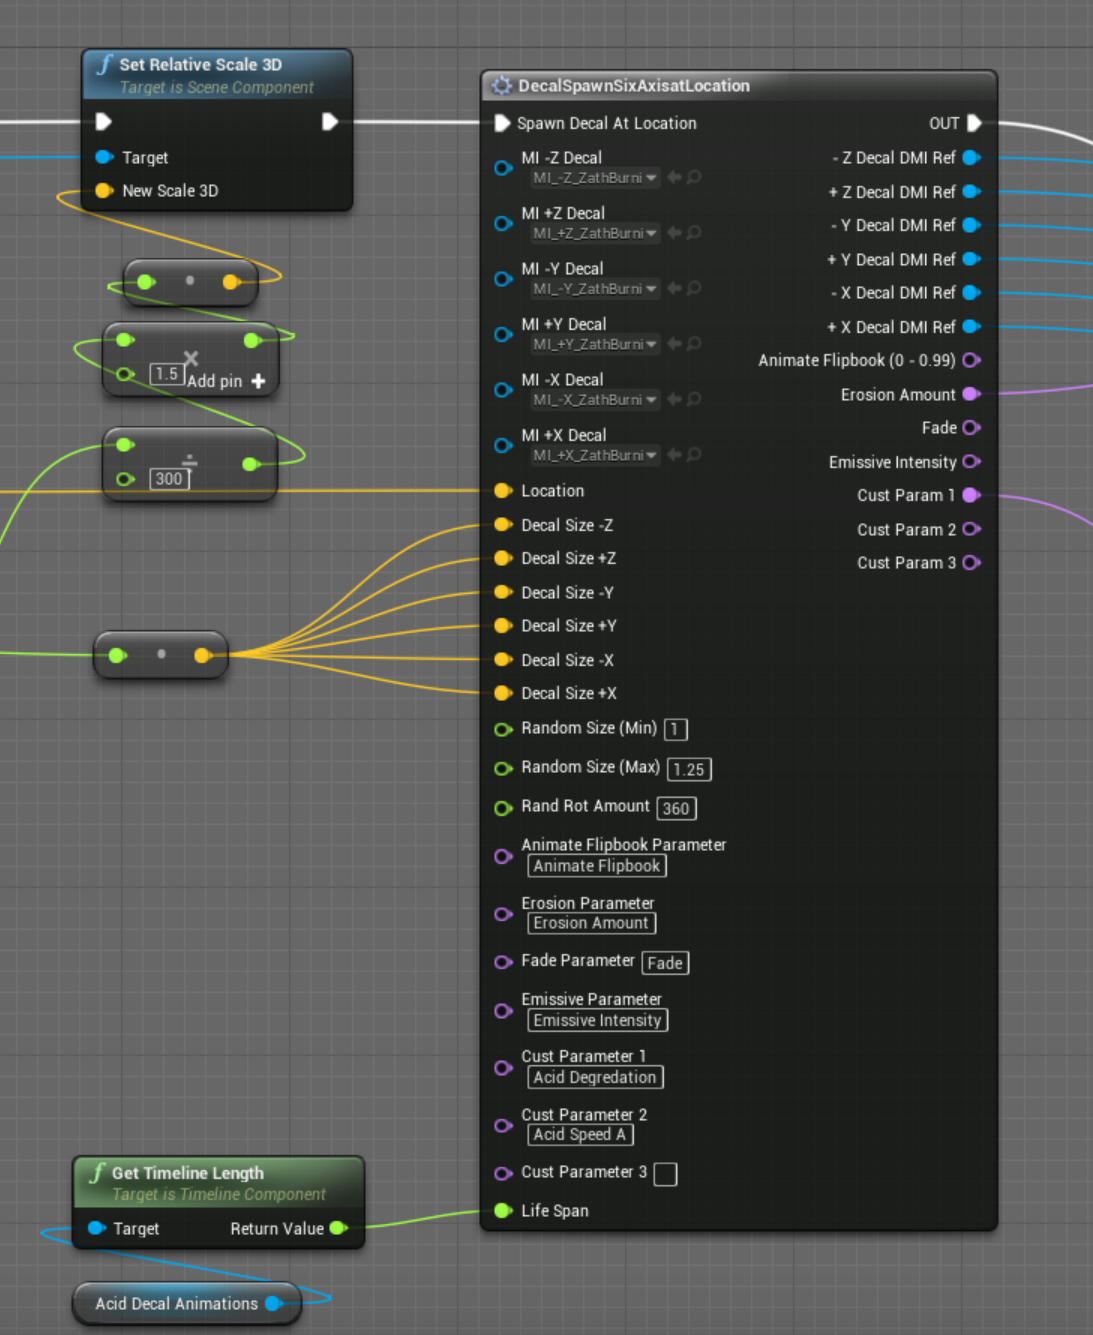
Below is a look inside the Macro for the Decal Spawn Six Axis at Location. The function will exhibit identical behavior.
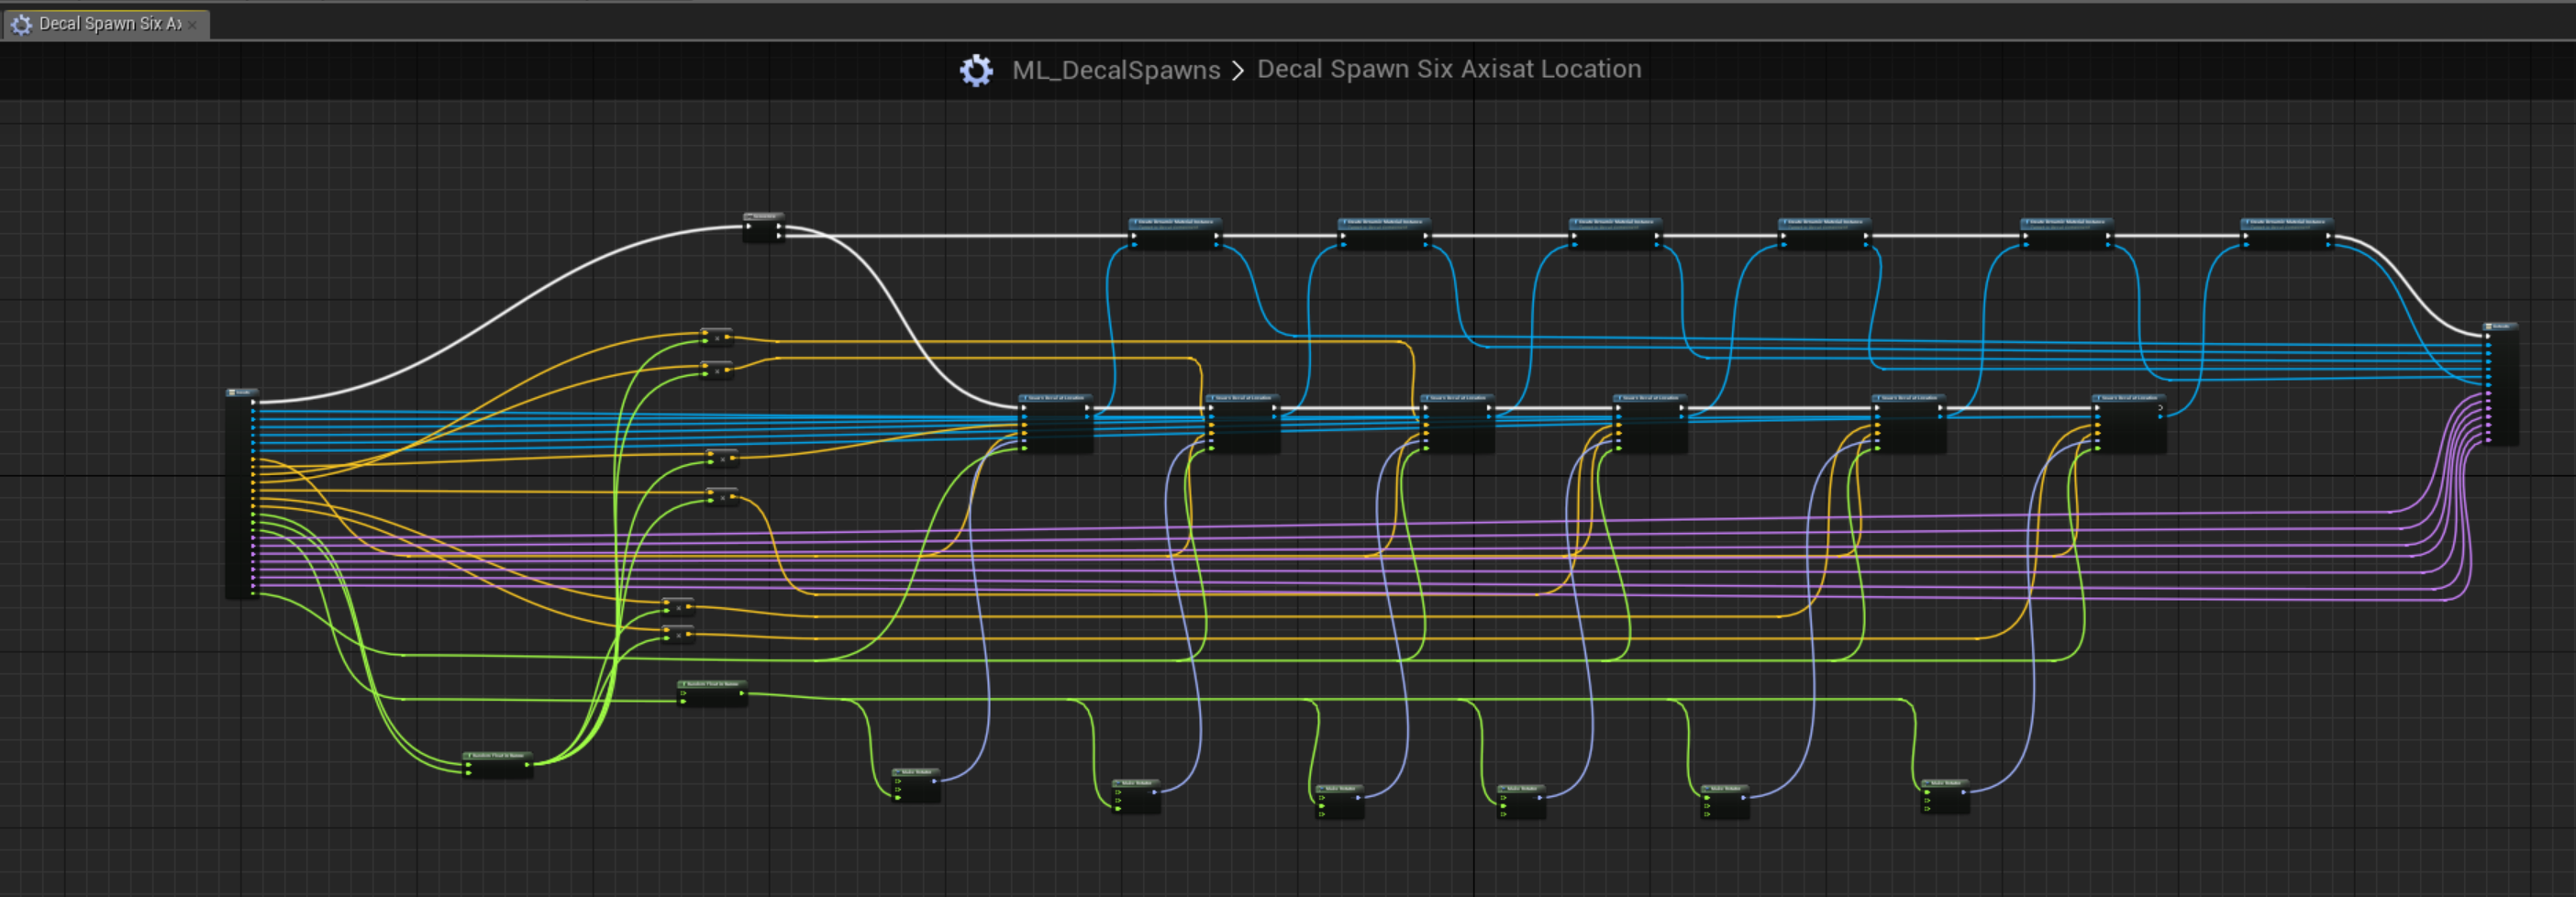
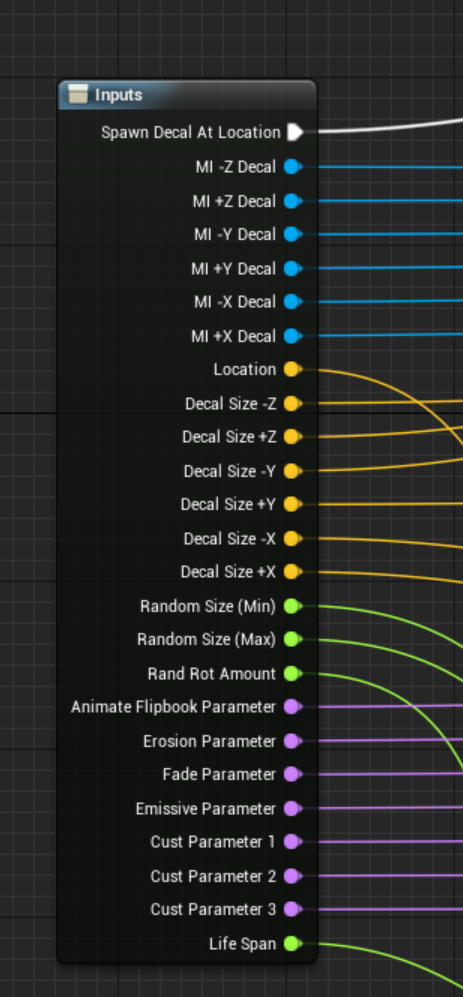
Here is a look at the input structure for the Macro. There are inputs for the Material Instances of each decal direction, spawn Location , decal size of each MI, random orientation parameters , a set of parameter names based off of the base material and a Life Span input controlled by the animation timeline.
Decal Rotation Values
Each decal has a predefined rotational value so that it spawns correctly according the the vector assigned to it.

Decal Random Values
Here is a look at how the random values are constructed. Each vector is multiplied by a random float within a range .

Dynamic Material Instances
The Dynamic Material Instances are created per decal and setup via a sequence to be handled after the decals are created. This will allow the Parameter Names that are handled from the macro to reflect global parameters used as well as custom defined parameters within new material setups.
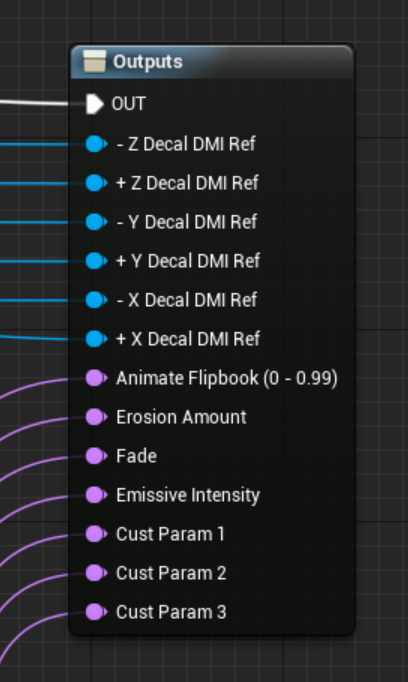
Outputs
Dynamic Material Instance Outputs
Each decal variation has an output related to the Dynamic Material Instance (blue) created for it since each one will need to be handled by the same Parameter Value created in the Blueprint .
Parameter Name Outputs
Parameter Name outputs (purple) reflect the parameters created within the decal materials. There are 4 global parameter names that should be used or present, if necessary, in every decal material created and 3 custom parameters that can be created with unique functionality within decal materials.
BLUEPRINT HOOKUPS
This next section will outline how the Decal Function/Macro is hooked up in Blueprints. Below is a sample overview of a use case for Zath’s Poison Projectile Impact decal.
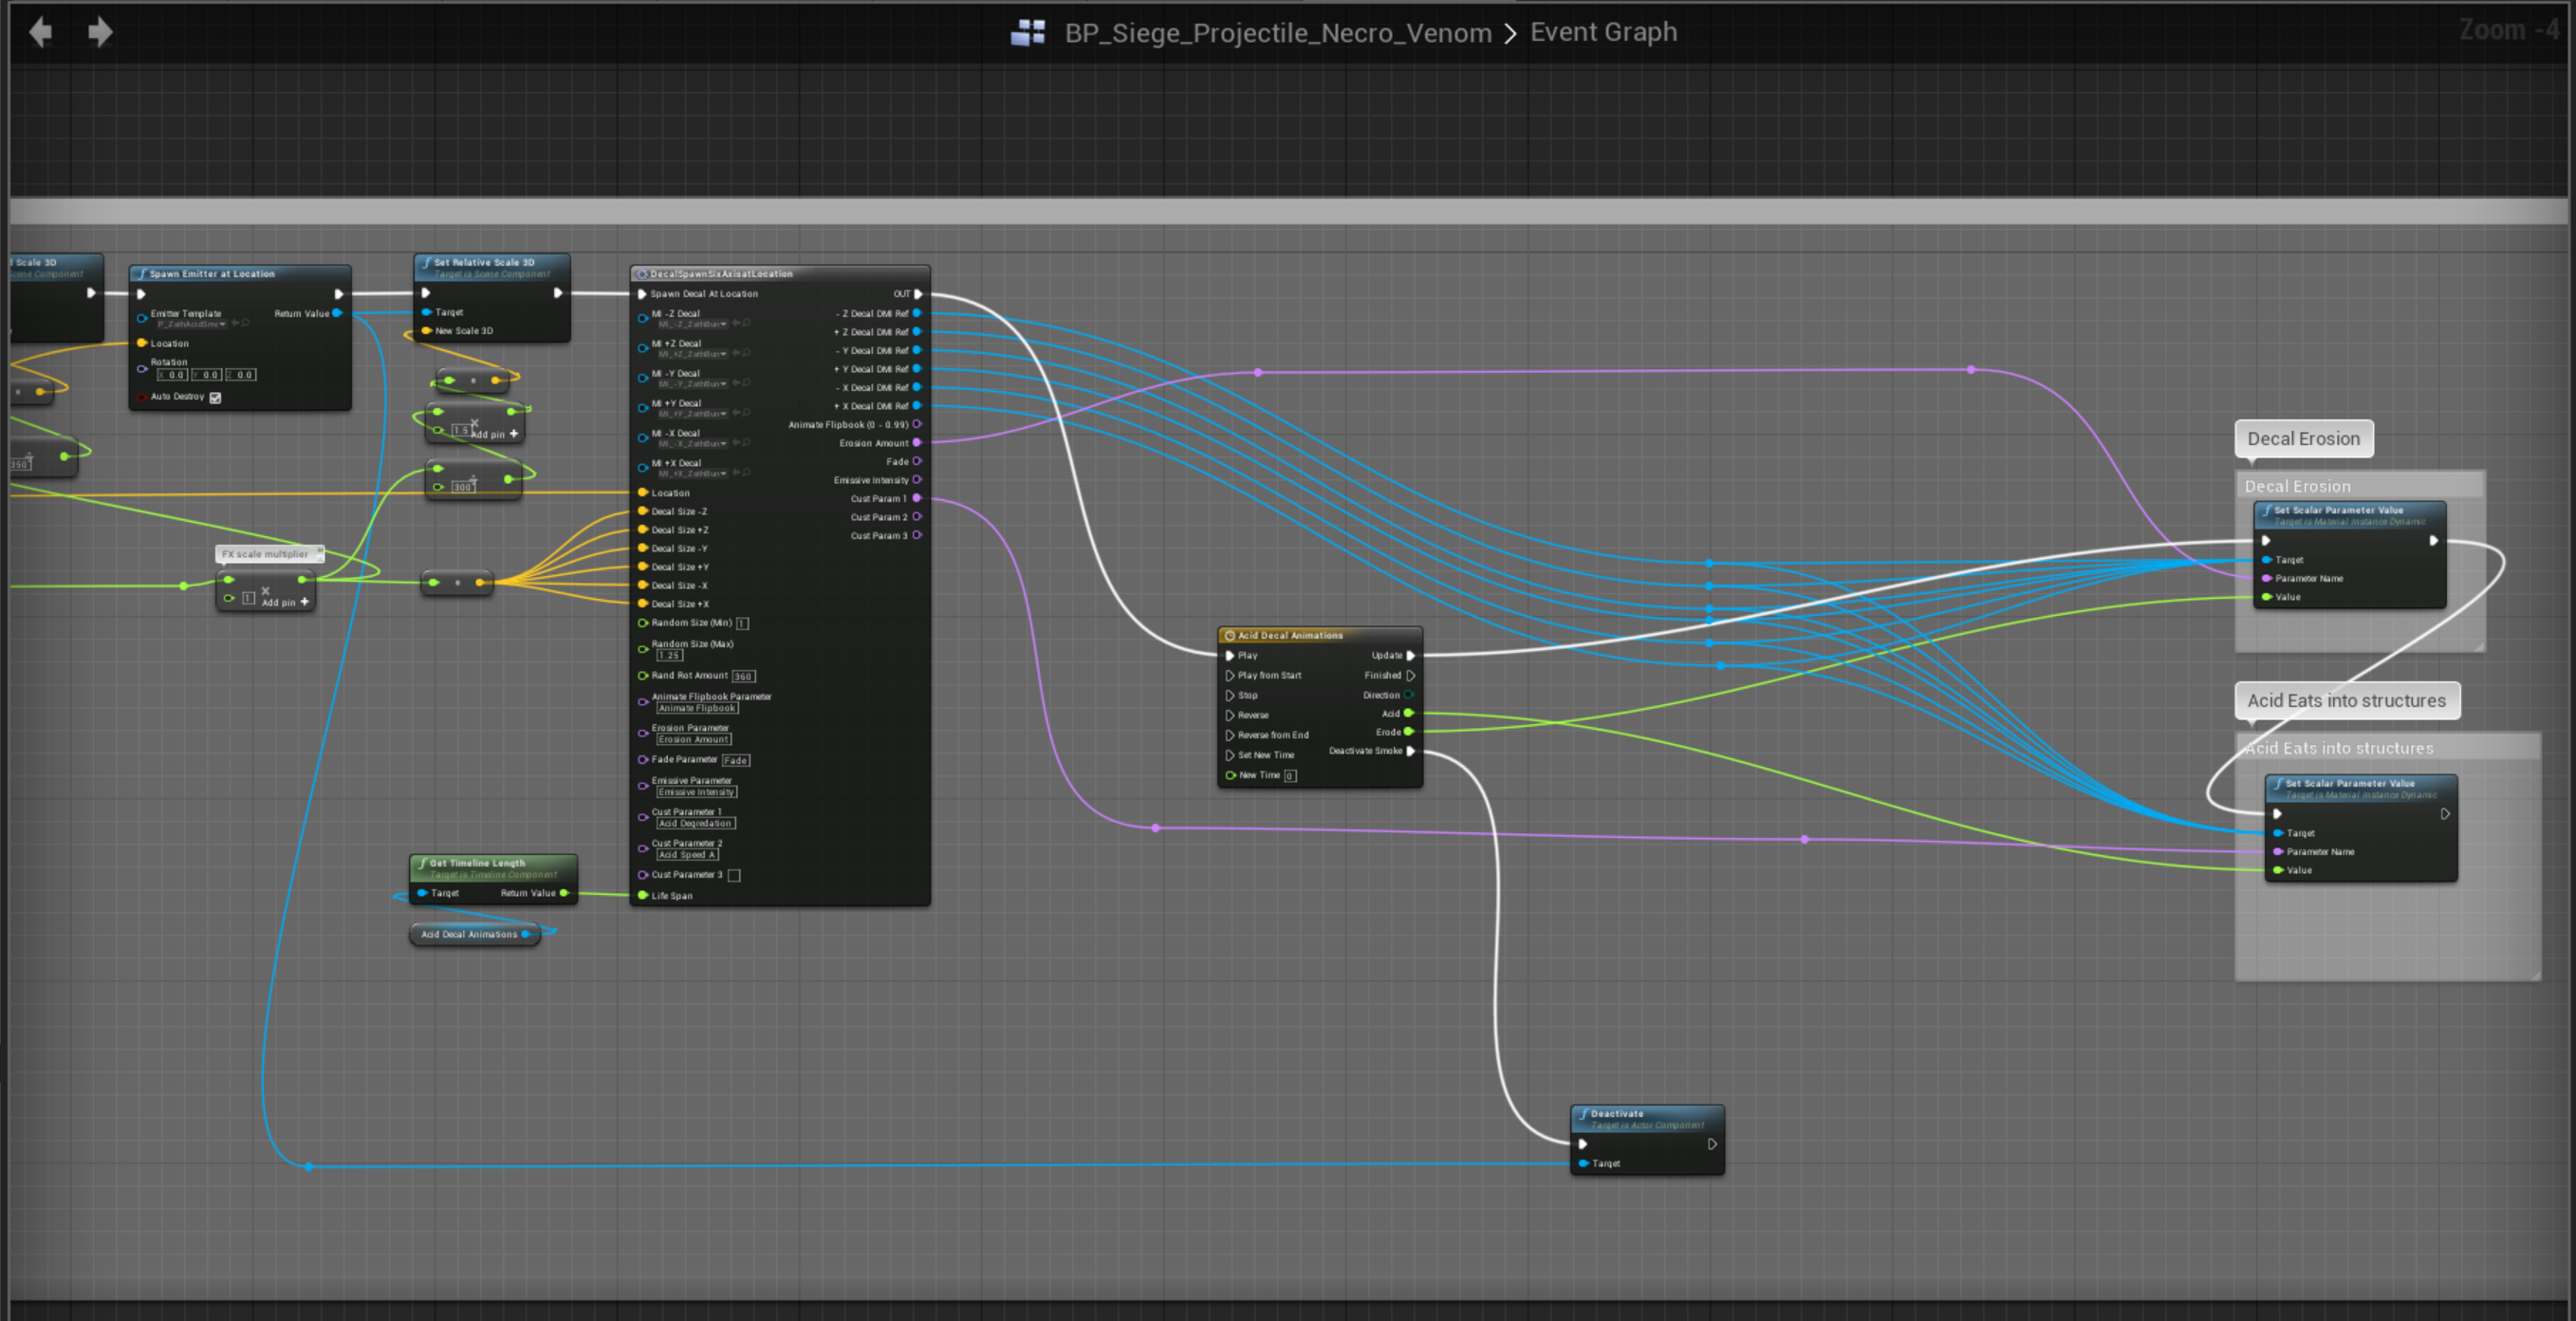
Close Up of the Macro in use.
Define Material Instances
Material Instances should be connected to the correct decal variation from the dropdown list.
Decal Location Hookup
The decal location is defined by the necessary BP target location. In this case it is where the projectile hits.
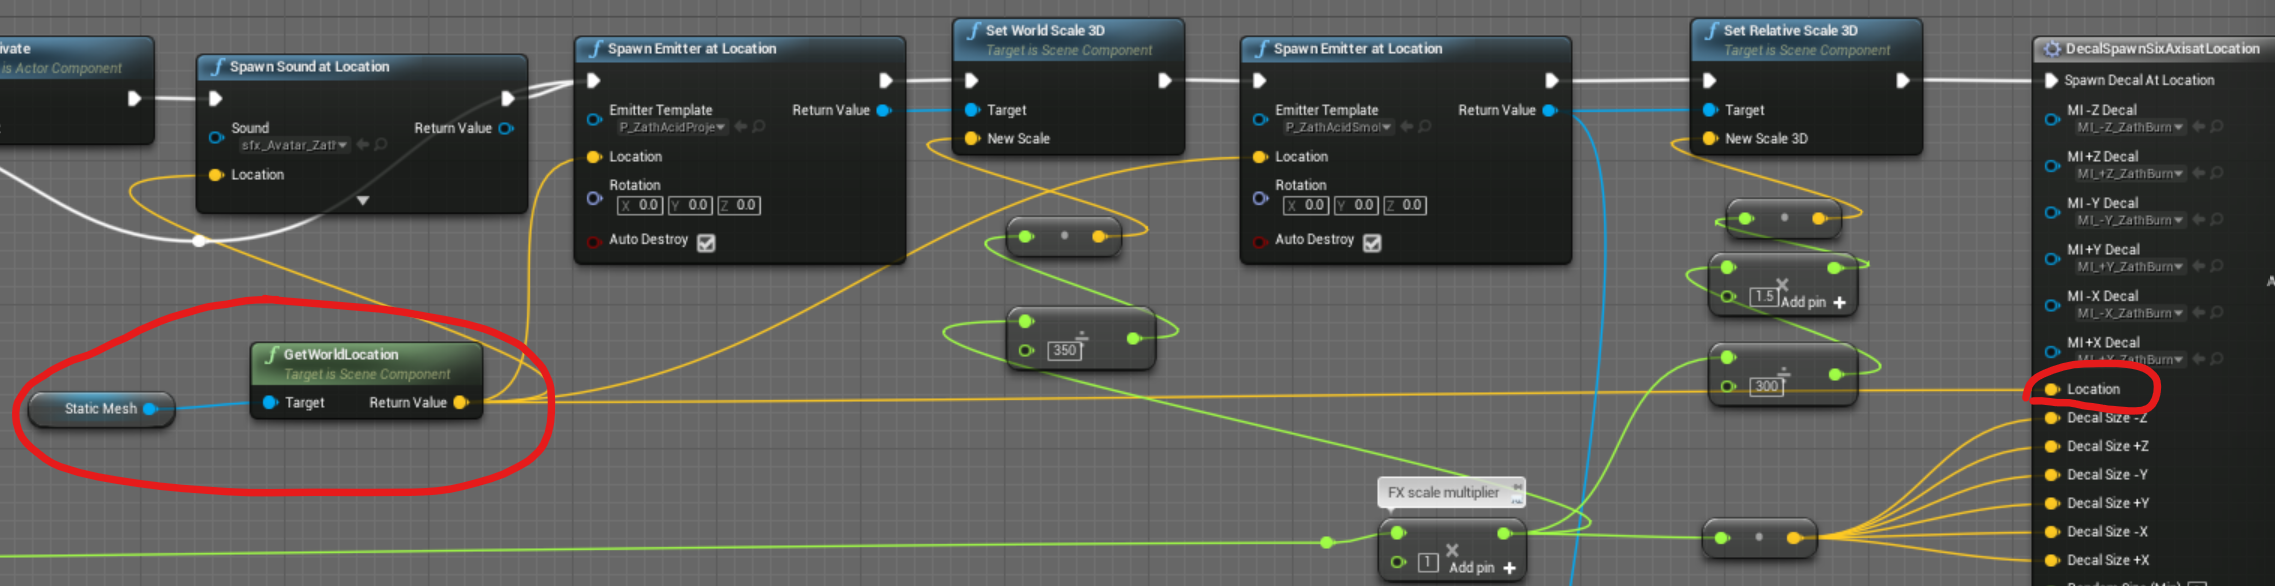
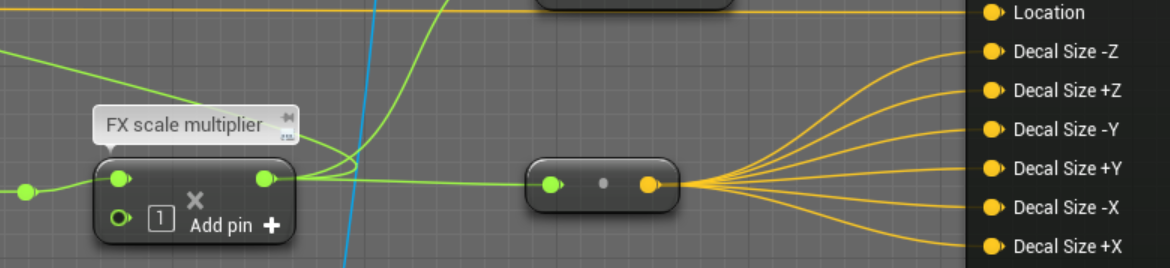
Decal Size Connections
While decal sizes can vary, the inputs in this use case are connected to a value in the blueprint for easier control. It is important to note that this is NOT a random value as the random values will be set by a scalar value (green) below.
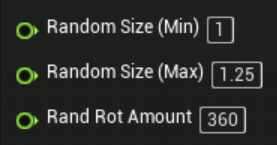
Decal Random Values
This is where you can define the random values of the size and decal orientation.
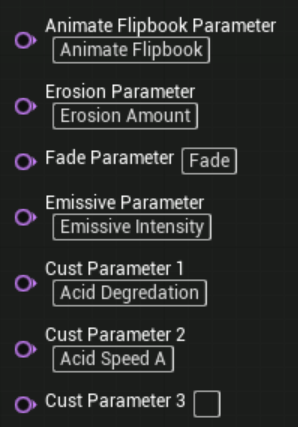
Define Decal Name Parameters
As previously mentioned, these values should reflect the correct parameters defined in the material. The top 4 are global and should be used in all materials if necessary. The bottom 3 can be new additions to materials and will only apply to select decals.
Decal Output Connections
Below is a quick look at the outputs for the decal, that will be hooked up to their respective values. They are to be used in conjunction with a timeline for better animation control.
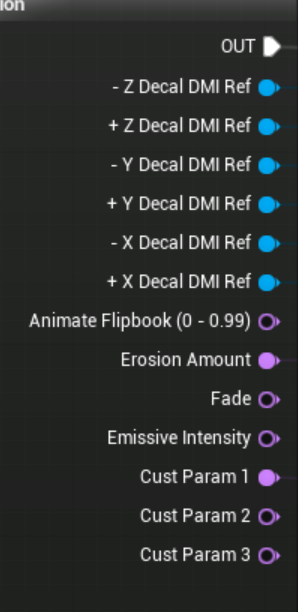
If a Scalar Parameter is set in the BP then all of the Dynamic Material Instances (blue) should be connected. As seen below, a value that corresponds to the parameter name controlled by a timeline value has been connected.

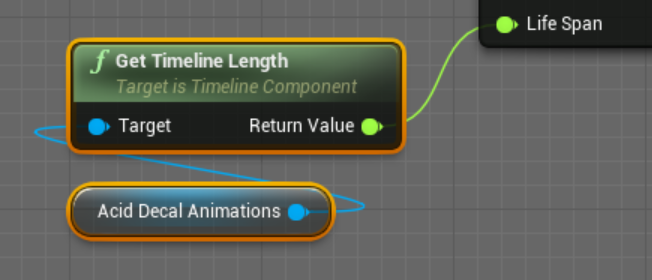
Decal Timeline and Life Span
The total Life Span of the decal is set in the Timeline through the Timeline length and will determine how long the decal lives. It should be setup as outlined below.