This tutorial will guide you through the process of creating a new harvestable material. The tutorial will assume that you know your way around some basics of the Unreal Dev kit and also how to make the actual item in the ItemTable. This example also will not teach you how to create an actual mesh and destructible - instead, we will be using existing meshes from inside the game for that.
Note: If you want to create a new item and put it into the tables but without creating an actual new resource-node, you can skip to the "Adding resource to loot-tables" part, which will take you directly to the section where you can take an item and put it into pre-existing nodes.
Process
Picking a mesh
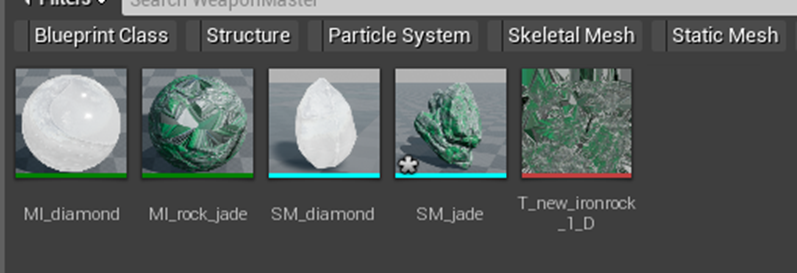
All resources require a static mesh. Some resources, like stones and trees, also should have destructible meshes. We will not go through how to create meshes in this guide, but if you know of a mesh in the devkit you would like to use, you can copy it and create destructible mesh from it.
We're going to need to switch the material for the mesh to new one - this isn't just a visual change; we are doing this in order to link the new material to a Physical-Material, which is what the engine checks to determine what resources should drop from the node. For this guide, we’ll assume that you want to use the same visual look, so we’ll just make copies of the material as well.
-
Make a copy of both the mesh and the material the mesh uses.
-
Make the mesh use the material you just copied.
With this done, we're ready to assign a physical material.
Assigning a Physical Material
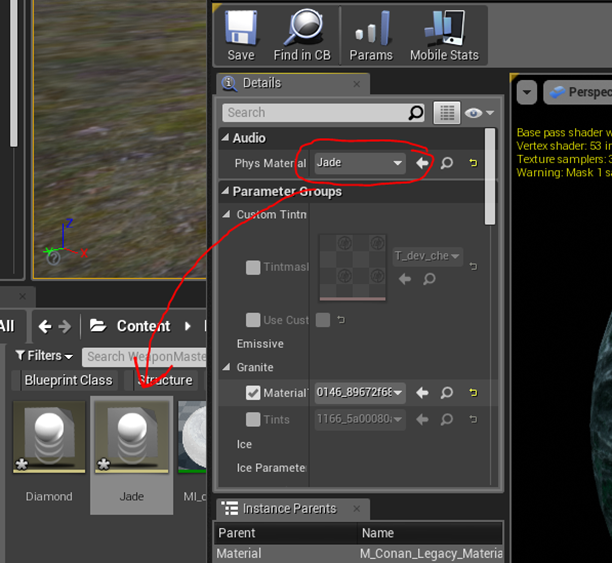
The physical material is an entry that determines how the material behaves and links to what resources are granted to the player when harvesting the resource node.
If you double-click on your material, you can see that it is may or may not be linked to an existing physical material.
The easiest way of assigning the correct type of physical material is to find one that already exist, copy it, and then rename it to something appropriate. After that, assign the Physical-material to your material.
Our work is almost done now - the final thing we need to do is to map our new physical-material to a new table.
Adding resource to loot-tables
Open the "LootTable_Resource" table and create a new entry here. This entry must have the same row-name as our created physical material.
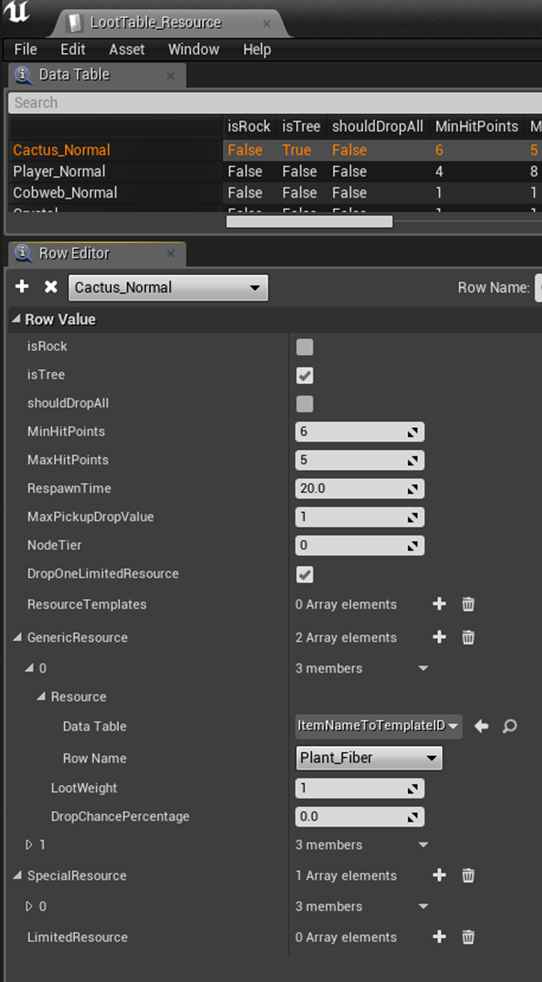
It may be worth going over this table in detail to explain what is going on here.
isRock - this should be clicked if the resource is harvested like a rock
isTree - likewise, if the resource is a tree, this should be clicked
shouldDropAll - Makes the node destroy itself after one hit (overrides Min/Max Hitpoints)
MinHitPoints - the minimum amount of hits that the resource can take before depleted
MaxHitPoints - the maximum amount of hits that the resource can take before depleted
RespawnTime - the time it takes for the node to respawn
MaxPickupDropValue - leave this as is, it's not used
NodeTier - defaults to 0, which allows any tier of any tool to harvest it, we'll get into this later. In the actual game, we don't do anything with this except for star metal.
DropOneLimitedResource - If this is checked the system will make certain that at least one limited resource drops, regardless of the drop chance for it
A quick note about ResourceTemplate/ - The resource template dropdown is optional and for our purposes we don't need it. It is used to set up global templates for certain monster types so that it is easier to assign loot to new monsters.
We won't need to edit this for our purposes right now but if you are creating a new monster and have a new item that you would like to use the same template as, say, spiders, you can select the spider template from this and your monster will drop all the things defined in that template (in addition to the extra items you assign below).
GenericResource /
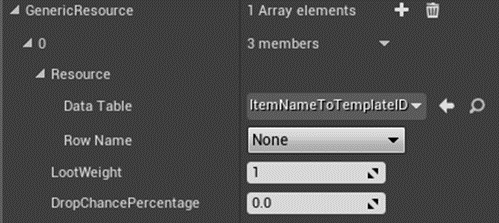
This part of the loot-table defines which resources are given out for every chop on the resource. The LootWeight and the DropChancePercentage entries here doesn't matter and you can safely leave it at 1/0.
Note that all the loot-tables go through the ItemNametoTemplateID table, which means that if you have created a new item, you will need to create entries for these in that table and add it through the mod-controller.
SpecialResource /
This part of the loot-table is a standard loot-table. You can enter as many resources here as you like, and assign a DropChancePercentage to them.
LimitedResource /
As with SpecialResource, this allows you to select any amount of resources to drop here, but - they are limited by the MaxDropAmounts value. Typically things like unique items or heads are set to MaxDropAmounts=1 here.
Dis/Allowing specific harvesting tools
You may want only specific tools to have access to your new resource. In our case, we want to only allow pickaxes to be used on the Jade node. For this, you will need to add a new entry to the ResourceStatTable.
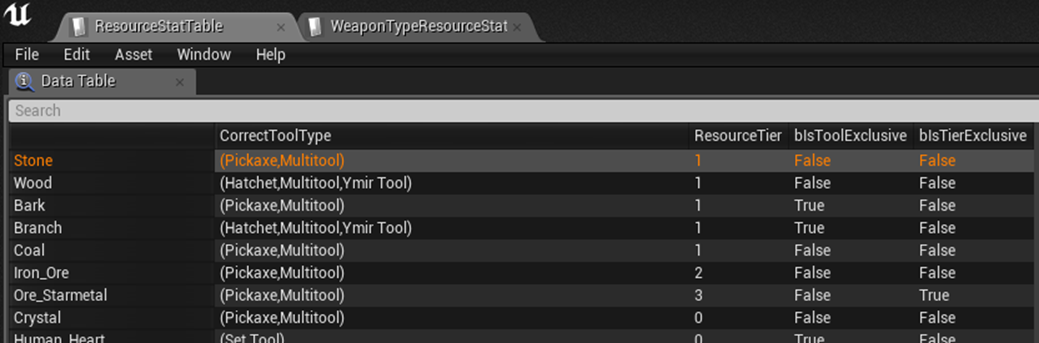
This table should be somewhat self-explanatory, but let's go through the options available in this table.
TableRow - This is the unique entry for the item. This needs to match the PhysicalMaterial.
CorrectToolType - This determines what tools are allowed for the resource. Note that you may have multiple tools with access to the resource
ResourceTier - This is used if you want the resource to only be available of tools of a specific Item Tier (see below)
blsToolExclusive - Check this if you want the resource to only be allowed for the specific tools listed in CorrectToolType. Note: There have been some issues with this functionality, which led to the implemntation of a second table called "WeaponTypeResourceStatTable", more about this table below.
blsTierExclusive - Check this if you want the resource to only be harvestable by tools of a specific Item Tier. Item tier can be set up in the ItemTable. Usually the tier list goes like this:
0 - Any tier
1 - Iron
2 - Steel
3 - Anything above Steel
Whitelisting resources
In addition to making tools exclusive, you may also want to whitelist resources. This can be done in the WeaponTypeResourceStatTable.
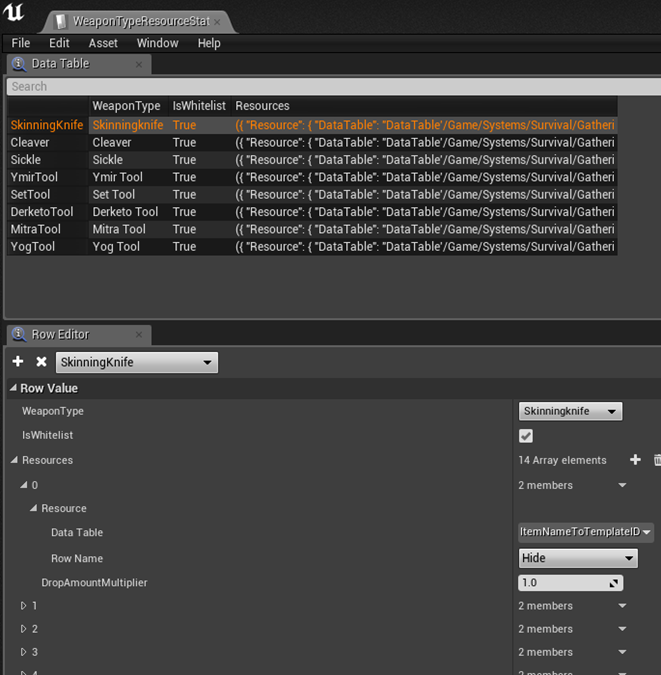
Here you can set up a whitelist for each tool, should you need to.
Create a new Foliage Type
In order to paint your new resource, you should also create a new foliage type so that you can use it to paint your resource into the landscape. You can do this by right-clicking anywhere in the content browser and selecting “Miscellaneous/Foliage Type”. Double-clicking on the new foliage type will allow you to change a number of settings for your foliage, but most importantly, you can set up the mesh and Component Class.
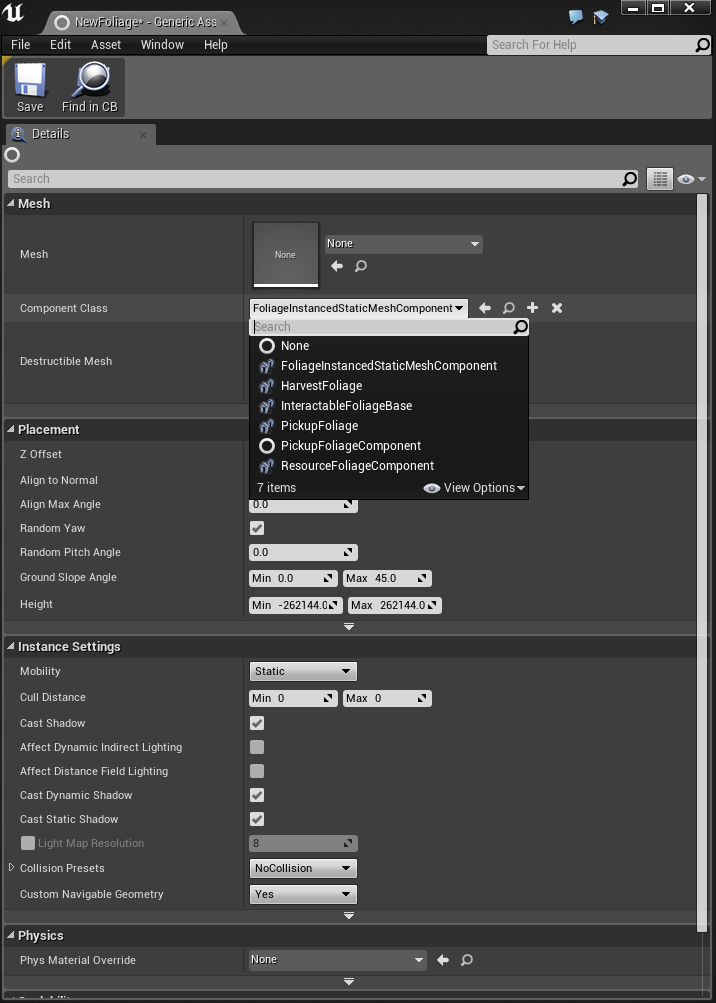
Mesh
/
This section allows you to set up what mesh and destructible mesh you will be using for your foliage. Also - very importantly - it allows you to set up if your foliage should be harvestable or pickups.
-
If your foliage is HARVESTABLE, you should set the Component Class to "ResourceFoliageComponent"
-
If your foliage is PICKUP, you should set the Component Class to "PickupFoliageComponent"
Placement
/
Placement allows you to set up parameters for foliage painting. You can control things like Slope Angle, that limits where your foliage gets painted, max height (no flowers above height 20000, for example) or alignment for your foliage.
Instance Setting
/
This allows further customization of your foliage. For the most part, you can leave this as default, unless you have good reasons to change your foliage. Removing shadows or collision from grassy foliage, or adjusting the Cull Distance for foliage are typical changes that you may want to do here (if anything).
Physics
/
You will want to leave this one alone, since physical-material is already set up in the mesh itself.
Painting resources
Now that we have set up the resources, it's time to actually paint them into the world.
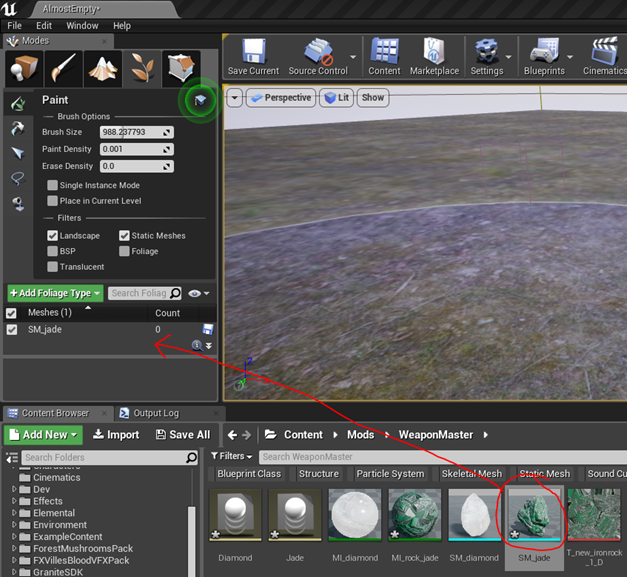
In the Modes tab, select the foliage brush (see image on the right).
With this brush, you can paint foliage actors in the world.
You will need to drag your foliage mesh into the "Meshes" section of the foliage and make sure that you have it selected.
Also worth noting is that you may want to first unselect any other potential brushes in the list before painting.
This guide won't detail the functionality of Foliage painting as such, but there is a comprehensive guide to Foliage in Unreal here: